The projects below run from under $15 to about $50, and the one that fits your weekend depends on whether you own a drill already. What they share is a hard-learned fix somewhere in the steps: a primer you cannot skip on brass, a magnet strength that keeps resin from sliding down the fridge, a hook size that stops crocheted poufs from going pancake-flat by Thanksgiving. The pinecone wreath alone taught me that baking the cones at 200°F before painting saves your fingers from sap for days, and that packing them too tight turns the whole thing into a brown blob from across the room.
1. Painted Pinecone Wreath
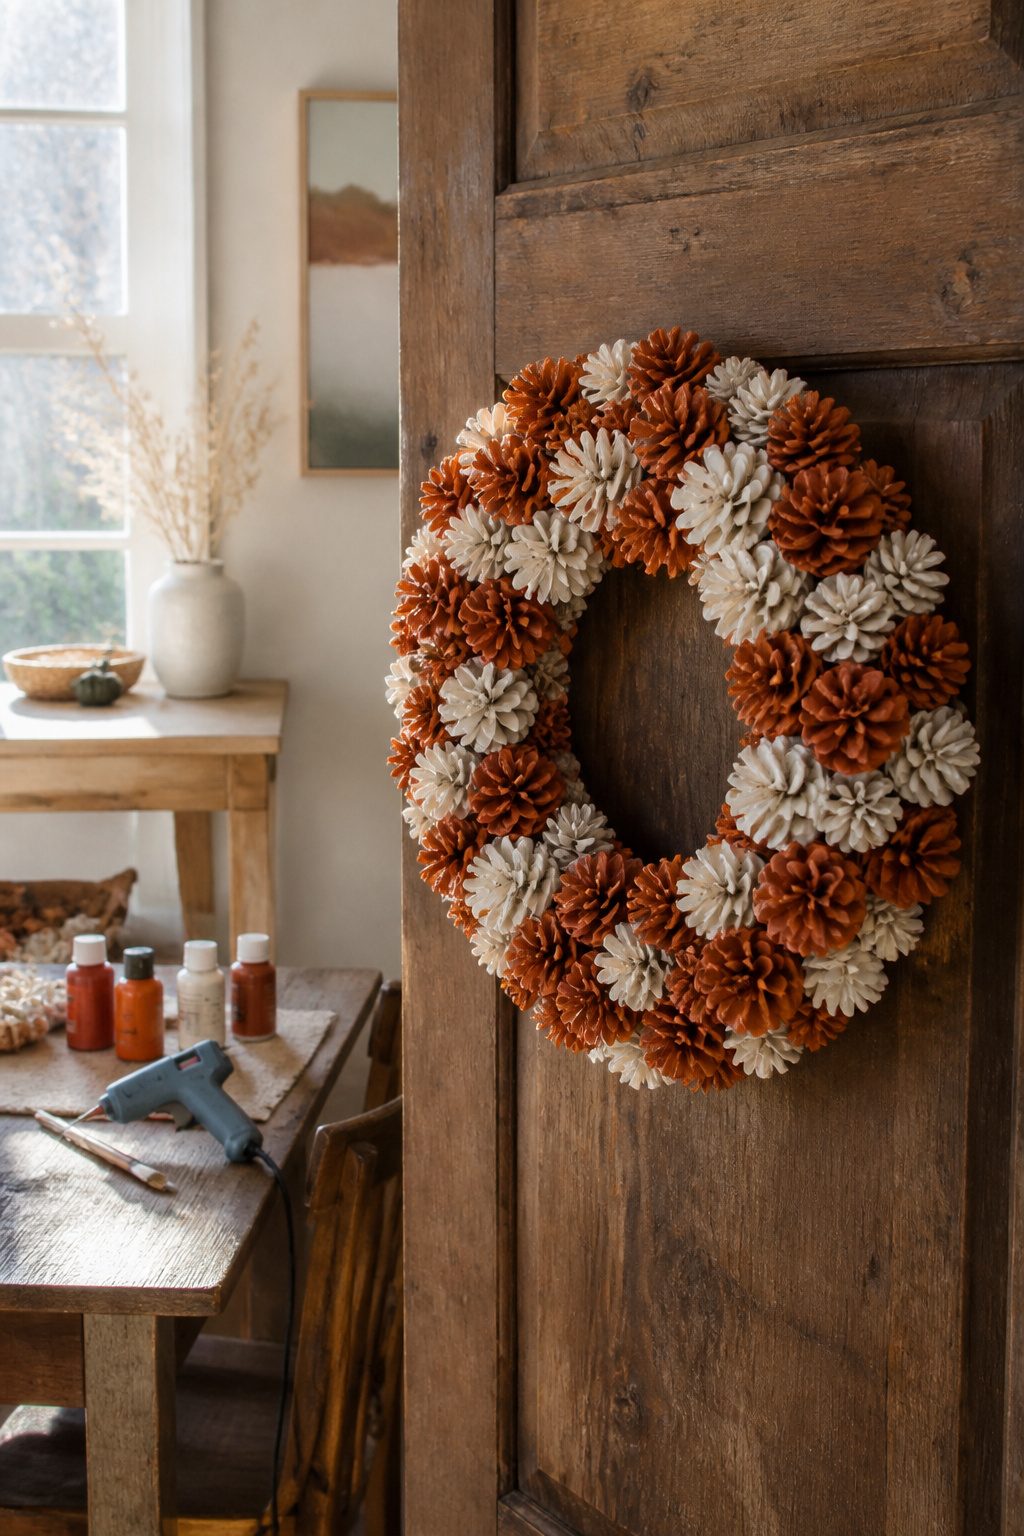
Pinecones look like they belong on a wreath already, which makes this one feel less like a craft project and more like assembling what nature left half-finished. Bake them at 200°F for 45 minutes to kill any insects and open the scales slightly; the heat draws out sap that would otherwise stick to your fingers for days. After that, a quick rinse in warm water with a splash of vinegar cleans off dirt without waterlogging the wood.
I laid mine out on newspaper and went at them with acrylic paint in burnt orange and cream, dabbing rather than brushing so the texture stayed visible. The mistake came when I started gluing them to the wire frame. I squeezed out too much hot glue, thinking more meant stronger, and ended up with thick yellow ridges that caught the light like dried candle wax. Fixing it meant pulling the worst offenders off while the glue was still warm, then reattaching with just a thin line that barely seeped between the scales. A 10-inch wire wreath form, a $5 bottle of craft paint, and a partial glue stick put the whole project under $15. The gaps between pinecones matter more than you think; pack them tight and the wreath reads as a brown blob from across the room.
2. Crocheted Pouf
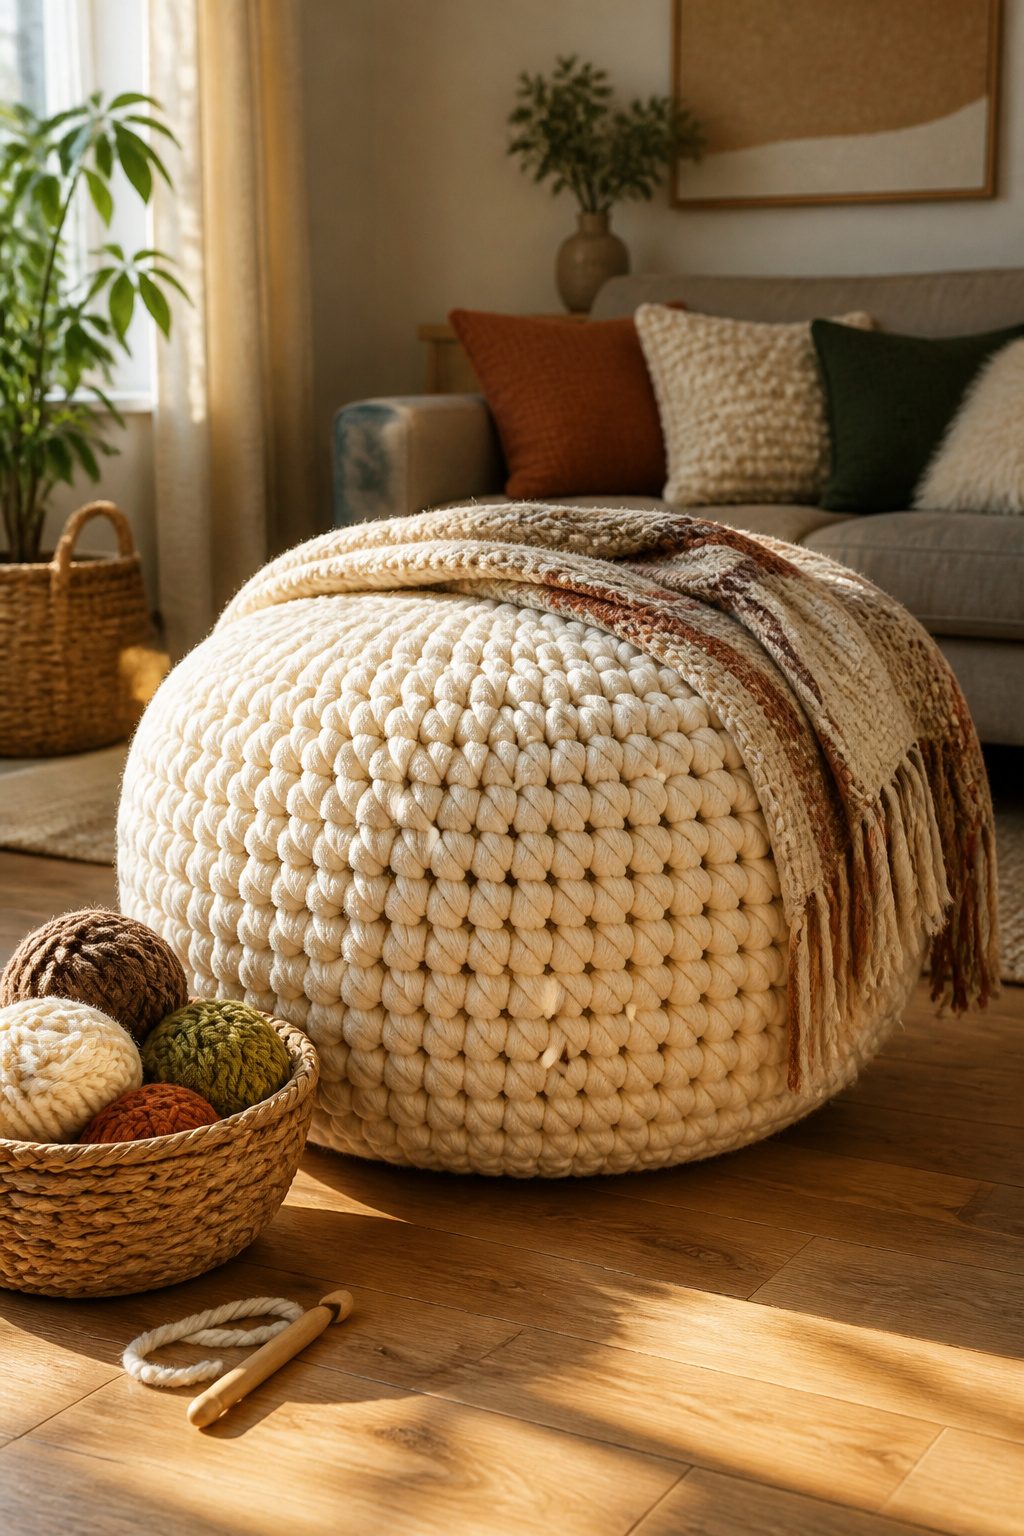
A floor pouf stuffed solid with fiberfill turns into a pancake inside of a month. The trick is single crochet worked through both loops but with a size or two smaller hook than the ball band suggests, which builds a fabric dense enough to hold its own structure. I learned this the hard way after my first attempt, a worsted-weight pouf in the recommended J hook, went slouchy before Thanksgiving. Six months later, the replacement in super bulky yarn, maybe a six-weight, with an N hook still sits upright and takes my weight without touching the floor. The stitches are tight enough that you feel the texture under you, not the bag of beans inside. Speaking of beans, most makers use a liner bag of dried lentils or poly pellets for the base weight, then the crochet shell does the rest. Super bulky yarn is not cheap per skein, but a pouf only needs three or four, and the resulting piece reads as furniture rather than a stuffed toy.
3. DIY Magnets
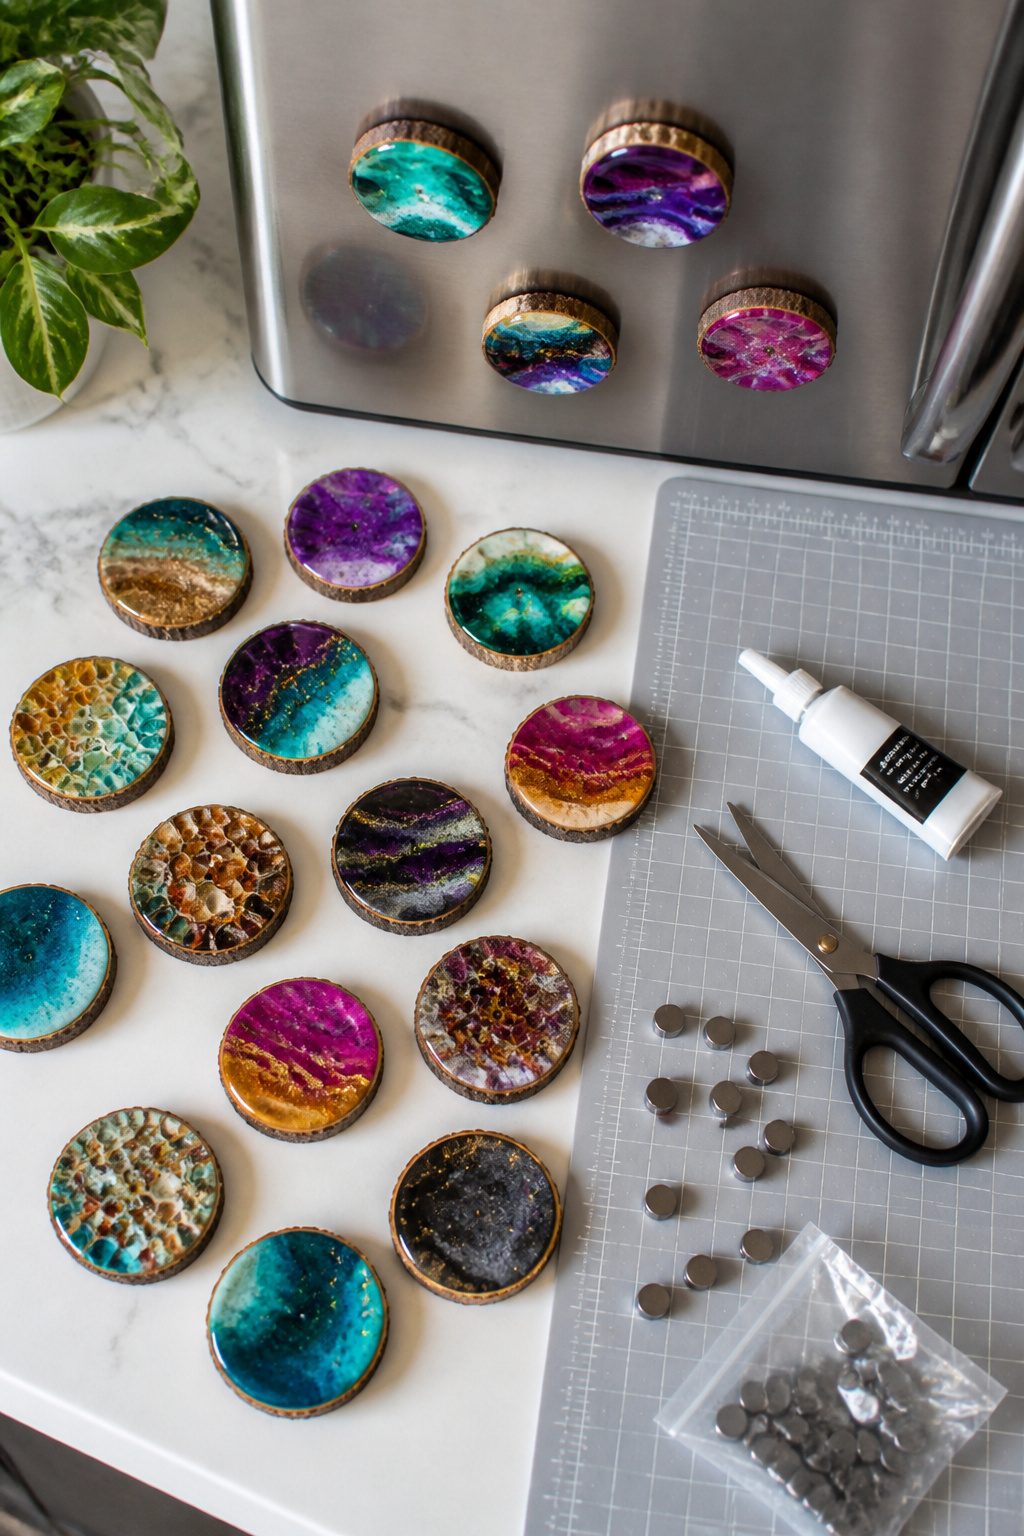
Small wood slices, resin pours, and polymer clay all make refrigerator magnets that look handmade rather than hobby-store generic, but the magnet itself determines whether they stay put or slide down to the ice dispenser. I learned that the hard way after a set of cute birch-slice magnets I made with basic craft-store magnets ended up clustered at the bottom of the door within a week.
The fix was switching to rare-earth neodymium magnets rated at least N42, which grip through the material and hold even a quarter-inch resin slab steady when someone slams the freezer. For anything under two inches across, a single 10mm x 2mm disc does the job; larger pieces need two, embedded flush so the back stays flat against the steel. Wood slices need the magnet countersunk and glued with epoxy, since wood glue eventually lets go in kitchen humidity. Resin pours let you suspend the magnet in the mold during the pour, which looks cleaner and lasts longer. Polymer clay bakes around the magnet just fine at 275°F, though the magnet weakens slightly and needs that N42 rating to compensate.
Cost stays low: a bag of fifty neodymium discs runs about the same as a coffee run, and a weekend covers making, curing, and testing them against an actual refrigerator door.
4. Crocheted Scrubbies
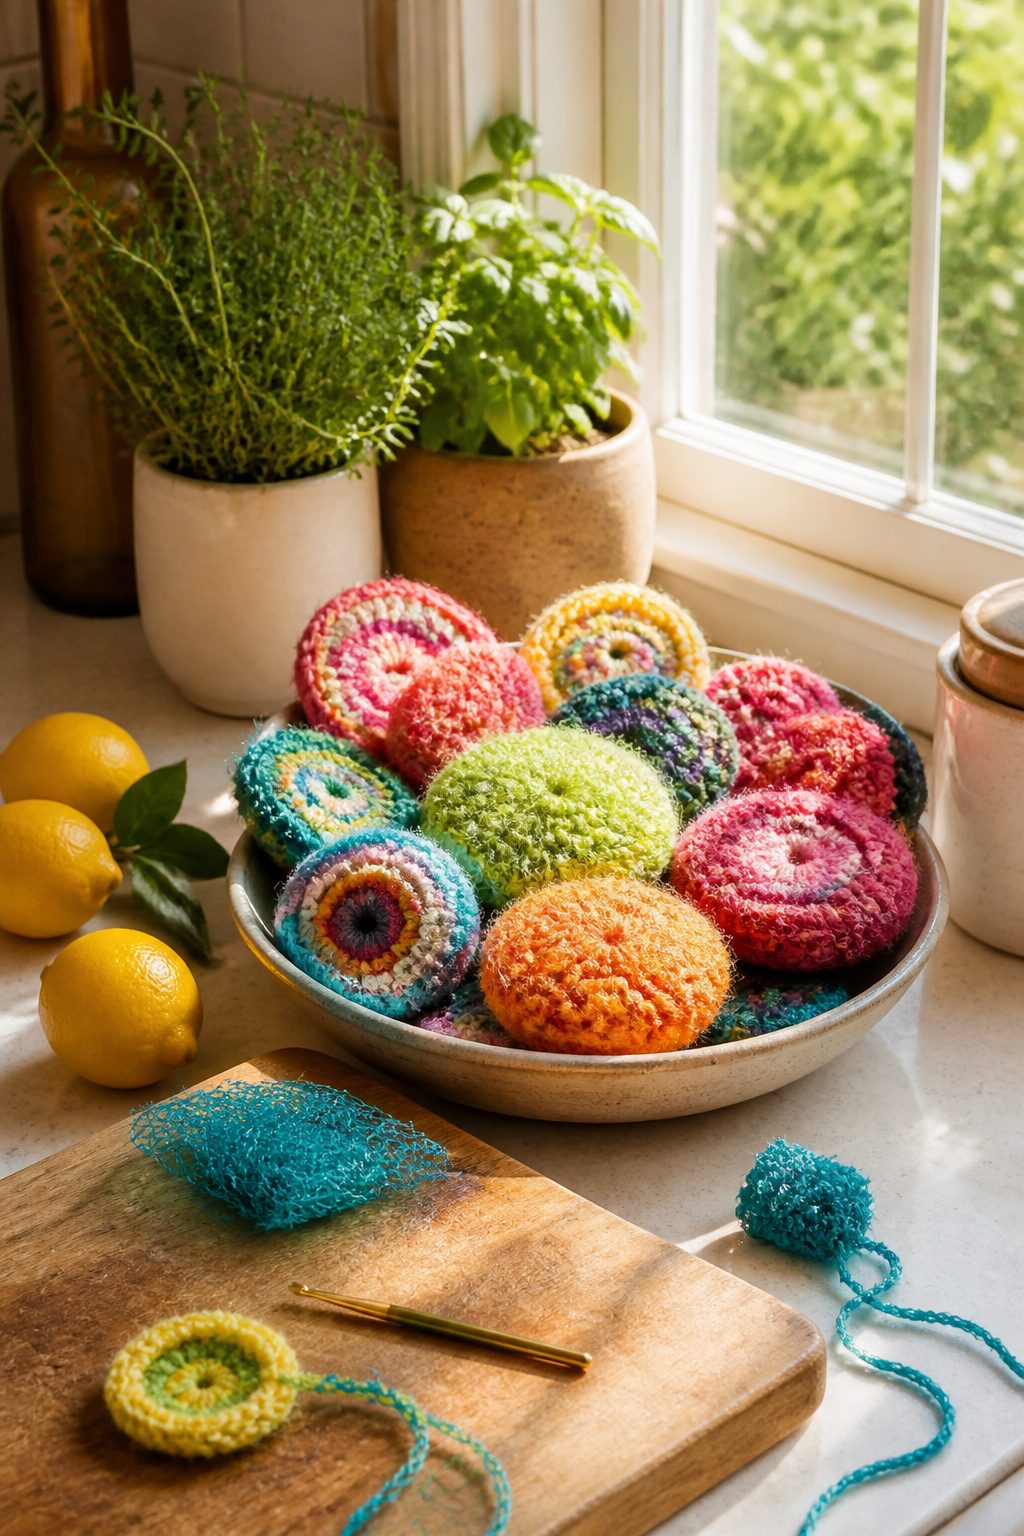
Nylon netting yarn, the kind sold for kitchen scrubbies, dries overnight and stays odor-free because water never pools inside the fibers the way it does in cotton. My grandmother’s generation already knew this; they were making and selling these long before the current craft revival.
The source material matters more than the stitch pattern. Tight tension scrubs pots; loose tension scrubs nothing. Work the netting with a hook small enough that each single crochet stands up stiff, almost bristling. Give it slack and the loops flatten into a soft pouf that pushes food around instead of lifting it. Two rounds of plain single crochet after the increase rounds, worked tight enough that the fabric barely yields to a thumb, hits the right balance between aggressive and nonstick-safe.
5. Painted Candlesticks
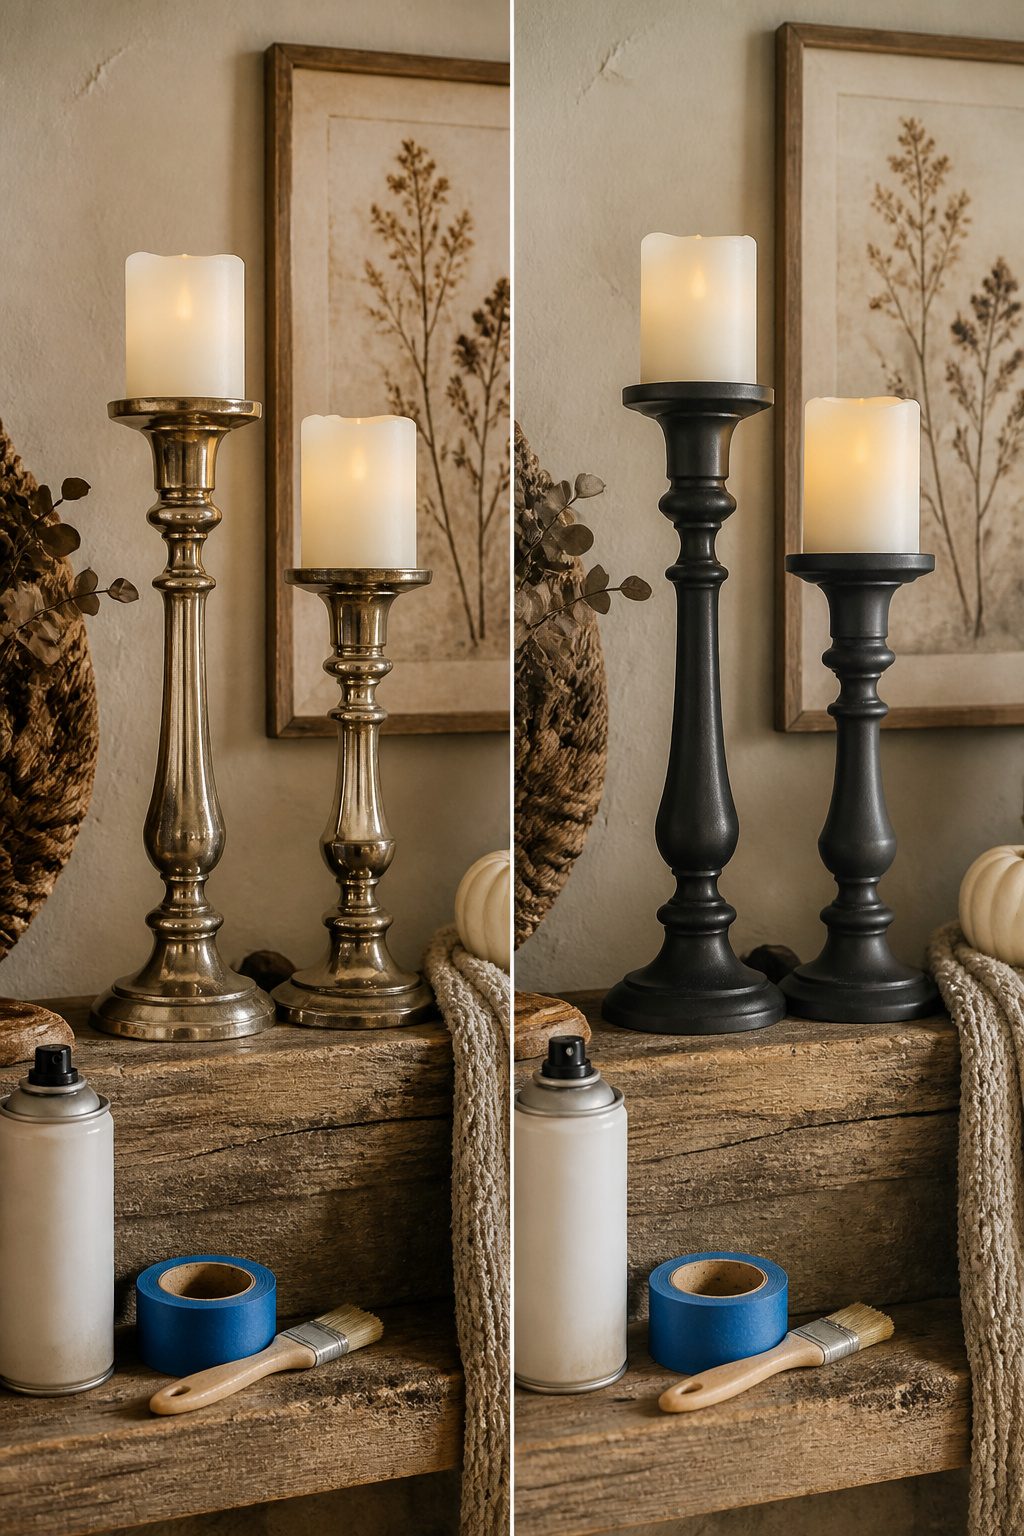
Brass candlesticks from a thrift store run about three to five dollars each, and the weight alone makes them feel more expensive than anything new at that price. The trouble starts when you skip the primer. Acrylic spray paint sits on top of smooth metal like wet nail polish on glass, and the first time a candle burns down close to the cup, the heat lifts the paint in flakes you will find on your table for weeks.
I learned the hard way that self-etching primer made for metal is the step you cannot rush past. It bites into the brass enough that the color coat has something to grip. The finish that held up through two dinner parties was a matte charcoal I had left over from a lamp project. The one that failed was a dusty rose I loved in the can but that went on thin and showed every fingerprint; I had skipped the primer on that batch because I was impatient and the color was light anyway. The charcoal pair still sit on my mantel. The rose ones went back to the thrift store donation pile, primer flakes and all, within a month.
6. Macrame Flower Pot Hanger
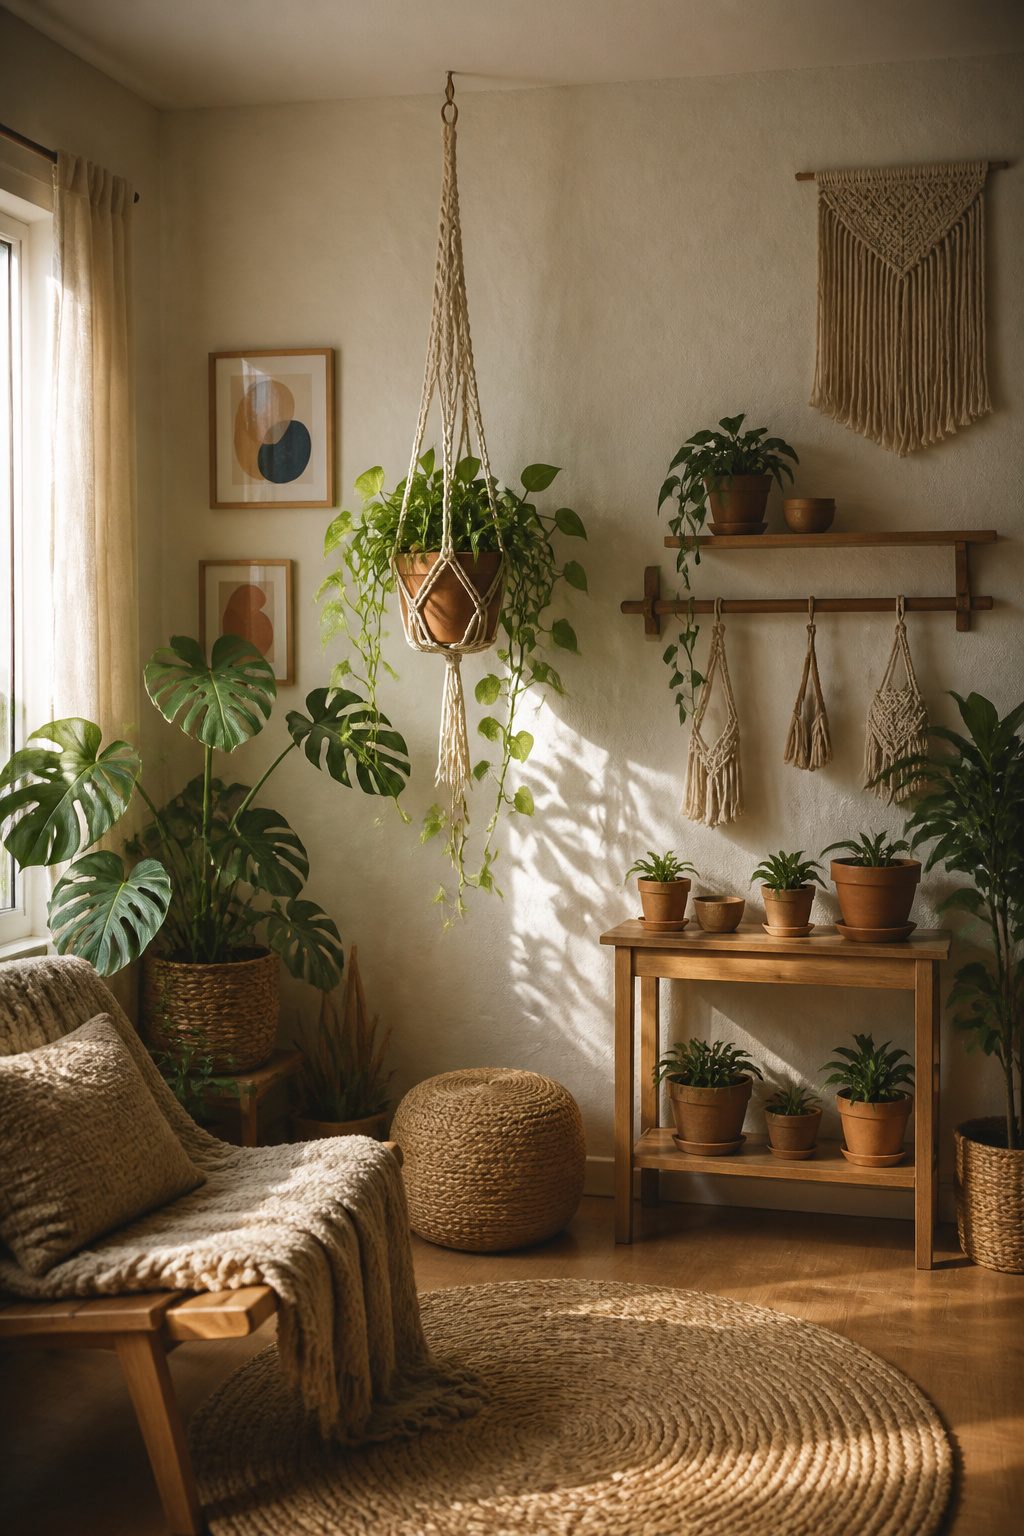
A hanging planter looks complicated until you break it into three knots repeated in a pattern. The square knot, spiral knot, and wrapping knot do all the work. I learned this from watching a dozen tutorials and noticing every single one relied on the same trio, just arranged differently.
Cord thickness matters more than the pattern itself. A wet 6-inch terracotta pot runs heavier than you’d guess, and anything under 5 mm stretches enough to leave your plant sitting on the floor inside a month. I would skip the craft-store cotton cord labeled 4 mm and go straight for 6 mm braided cotton or 5 mm twisted macrame rope. The braided structure holds shape; twisted gives that classic bumpy texture but frays faster.
Two hours is realistic for a simple four-strand hanger once your hands remember the motions. The first one took me closer to three, mostly on untangling cord I’d cut too long. Cut eight 12-foot lengths for a 36-inch drop, gather them through a ring with a wrapping knot, then split into four pairs and square-knot your way down. Finish with another wrapping knot around the pot’s waist. Spiral knots between the square-knot rows add the twist that makes it look like you did something harder.
7. Cardboard Papier Mache
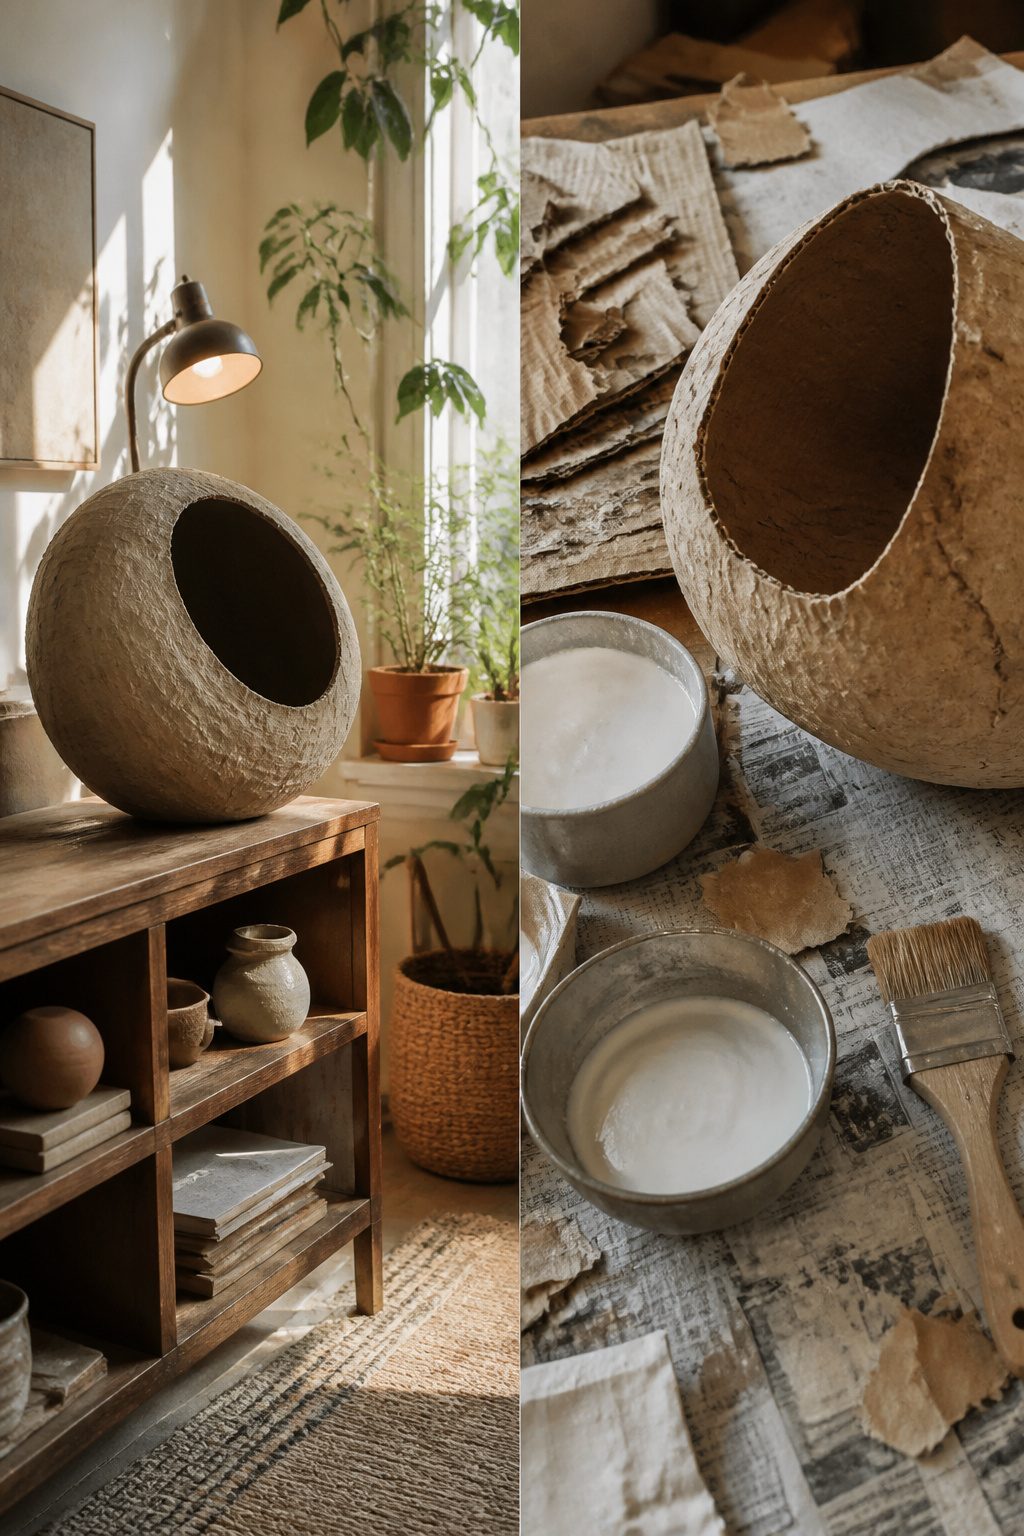
Cardboard strips and flour paste skip the balloon entirely, which matters more than I expected starting out. A balloon forces one round shape and the slow, nervous wait for it to deflate without collapsing the shell underneath. Strips of corrugated cardboard, cut two inches wide and soaked until soft, layer into whatever silhouette you want: a wide bowl, a flared vase, an abstract pod to sit on a shelf. The flour paste is just flour and water cooked to the consistency of thin gravy; it costs pennies and holds the layers together once it dries.
The drying time is where patience actually matters. Thinner pieces set up overnight, but anything sculptural and thick needs two to three days in a dry room with a fan moving air across it. I have rushed this, set a piece near the dehumidifier thinking I was clever, and watched the outside skin while the core stayed damp and later softened the whole form. A coat of white glue thinned with water, brushed over the finished shape and left another full day, seals the surface against bathroom humidity or summer kitchen steam. Without that sealant, the flour in the paste reactivates; the piece warps, sags, and eventually grows the faint gray bloom of mold you will not notice until it is too late.
8. DIY Hanging Shelf
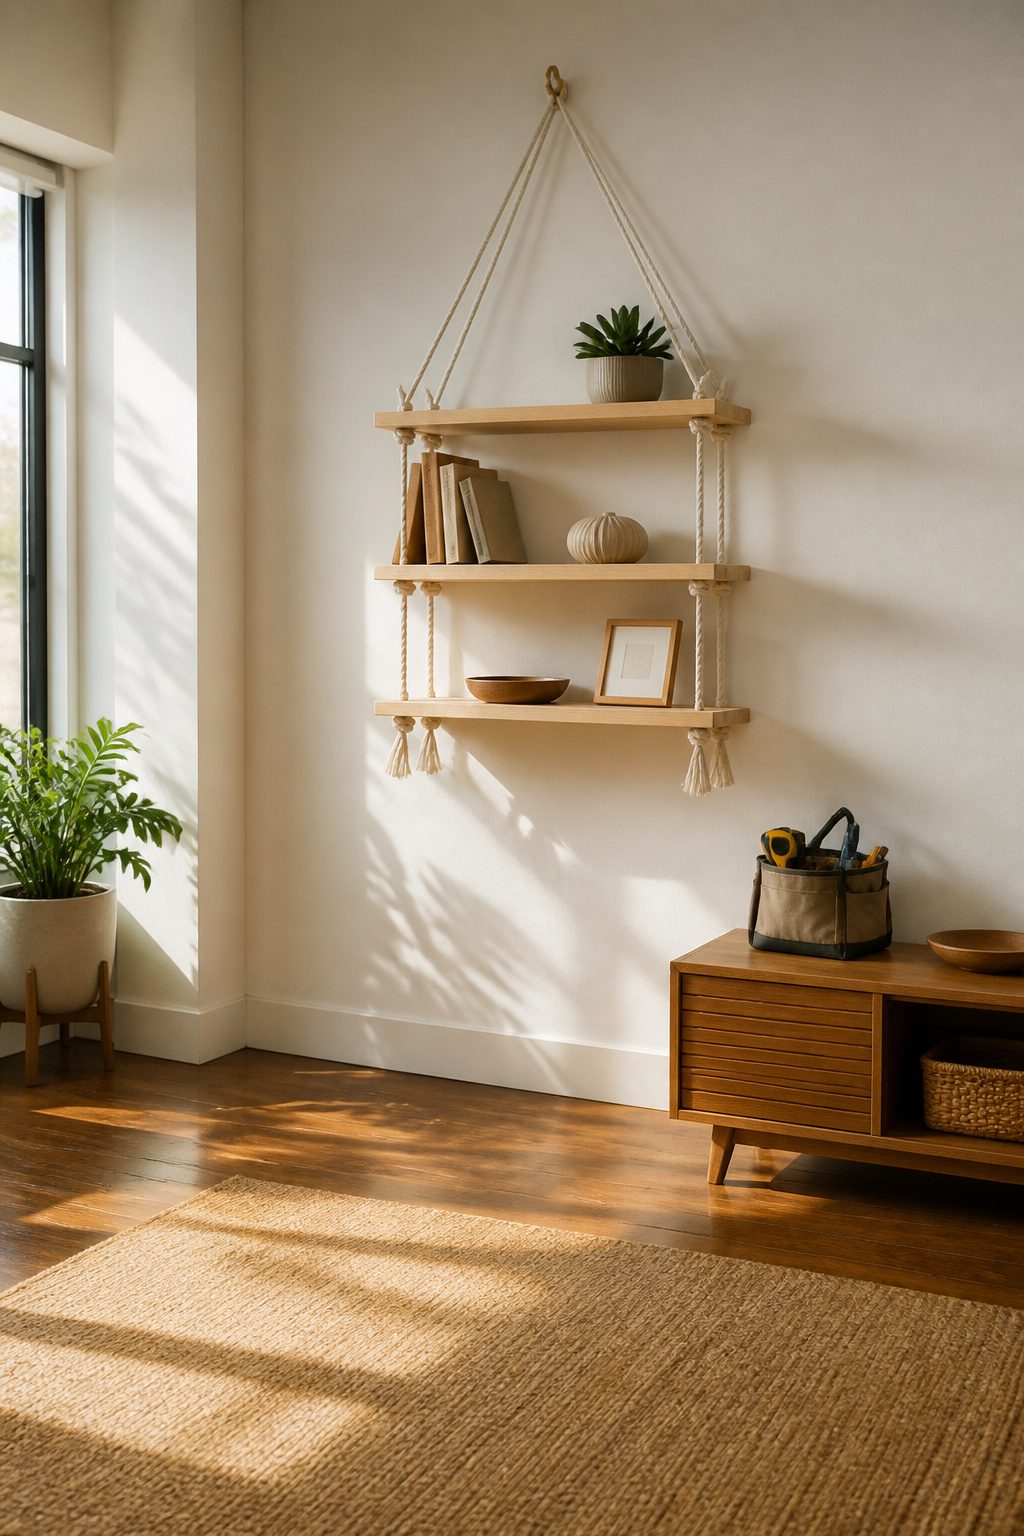
Three strands of twisted cotton rope, 3/8 inch or thicker, hold their shape under weight better than braided rope, which relaxes and lets shelves drift. I learned that after swapping out my first attempt. For the boards, pine shelving from any home center works if you finish the underside; raw wood picks up hand oils every time you adjust a book.
The knot that keeps tiers level is a simple figure-eight around each corner bracket, pulled tight and locked with a half-hitch. What matters more is the ceiling anchor. My stud finder chirped confidently over a spot I marked, drilled, and hit nothing but plaster and a lesson. The joist ran three inches left of where the tool sang. After patching that hole, I switched to a thin finish nail tapped through the ceiling in a line until it bit wood, then measured back. The shelf has held for two years now, slightly askew from that first miscalculation but still carrying cookbooks without complaint.
9. DIY Fabric Covered Books

Wrapping hardcovers in fabric looks easy until you reach the spine corners, where the material bunches up and refuses to lie flat no matter how hard you press. The trick is to work the fabric in small triangles, folding each corner toward the center of the cover rather than trying to pull it straight around the edge. I clip the excess at a 45-degree angle before gluing, which removes the bulk that causes the puckering.
The glue matters more than the fabric. Mod Podge Fabric dries with enough give that the cover still opens and closes without cracking the finish. Regular Mod Podge, the matte formula I had leftover from a paper project, cured stiff and left hairline fractures across the spine after the first read. The fabric-covered book became shelf decoration only, which defeated the point of using real hardcovers instead of thrift-store discards.
10. Mason Jar Lanterns
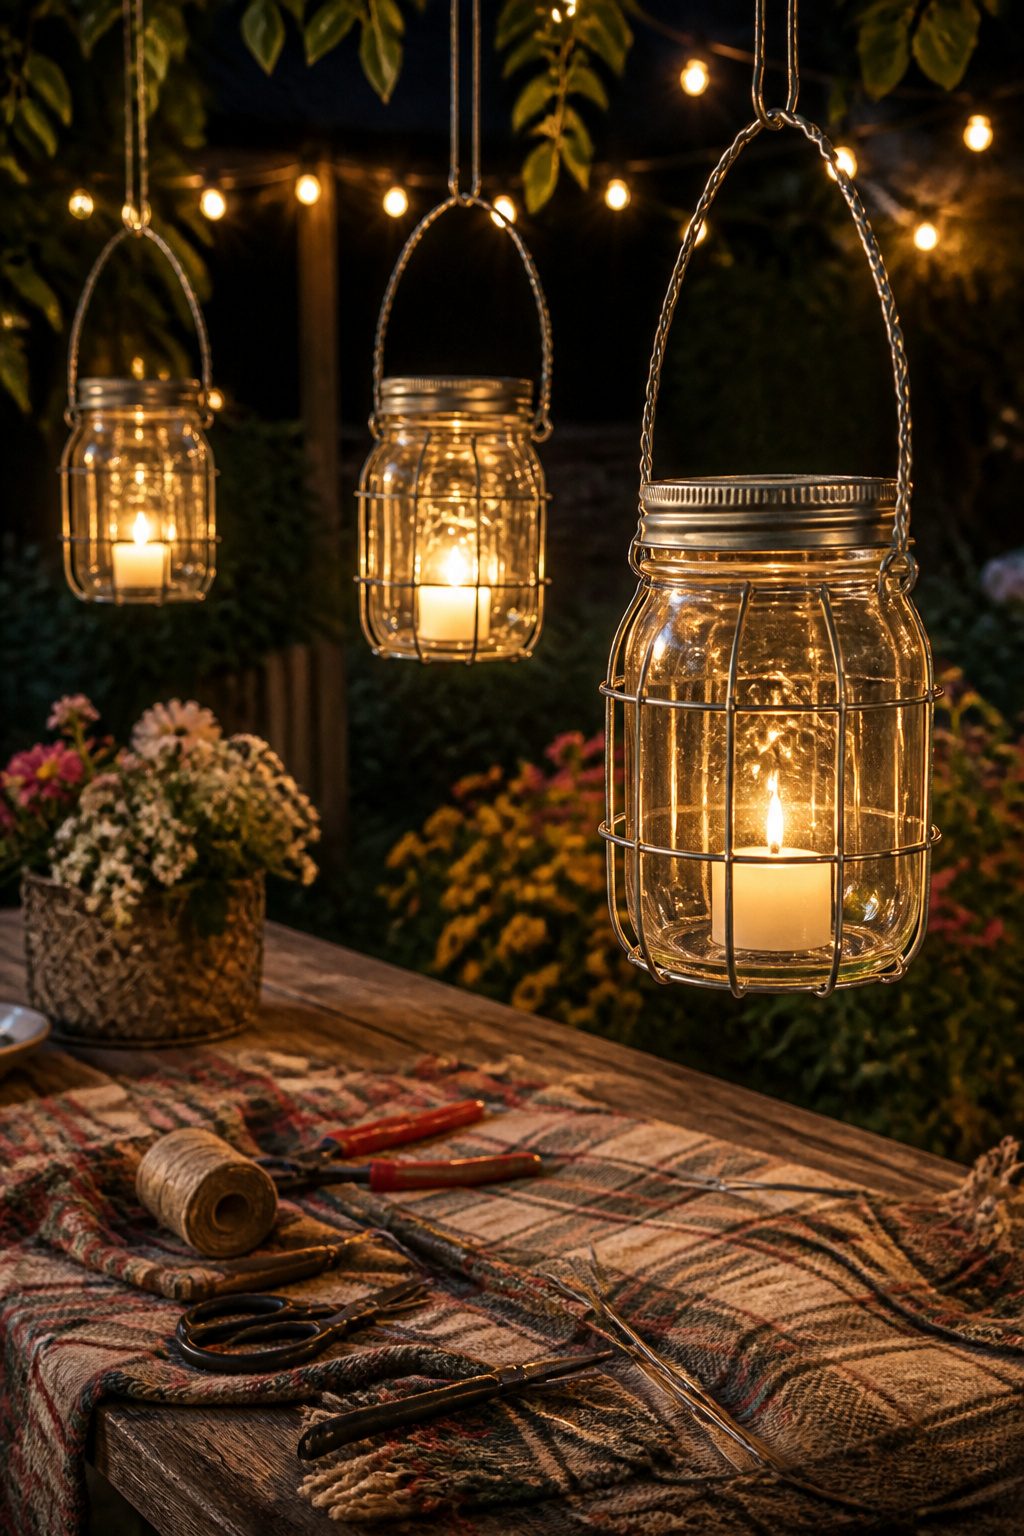
Wire gauge makes the difference between a lantern that swings and one that shatters. 14-gauge galvanized wire holds its shape under a full jar’s weight and the extra torque when wind catches the glass. Thinner wire fatigues at the bend points, and once the handle goes slack, the jar starts tilting against whatever it strikes.
I attach the handle with two separate loops, each anchored through its own drilled hole in the lid band rather than wrapping a single loop around the rim. The rim is the weakest part of the jar, and any rubbing there eventually cracks it. The lid band takes the stress instead, and the jar hangs straight because the attachment points sit opposite each other.
Real flame in a hanging mason jar is a mistake I made once and did not repeat. The glass gets hot enough to stress existing micro-cracks, and a swinging flame is unpredictable. LED tea lights eliminate that risk entirely, and the newer ones with a warm 2200K color temperature and a flicker circuit look close enough to real candlelight for outdoor use. The batteries last about 200 hours, which covers most of a season before you need to open the jar again.
11. No-Sew Cushion Covers

The envelope-fold trick for no-sew cushion covers sounds fussier than it is. You lay the fabric face down, set the cushion in the center, and fold one side over like a letter flap, then the other over it, pinning where the folds overlap at the back. Safety pins beat adhesive every time because the cover survives the washing machine; glue stiffens and eventually lets go in hot water.
Fabric width matters more than you’d think. A standard bolt at 54 inches gives you enough to wrap a 20-inch square with overlap to spare, no center seam needed. Anything narrower and you’re stuck piecing two lengths together, which defeats the whole point of a ten-minute fix.
I learned the pinning placement the hard way. Too close to the edge and the pins scrape the sofa; too far in and the flap gaps open. An inch from the edge, spaced every four inches or so, has held up through three washes now.
12. Washi Tape Wall Designs
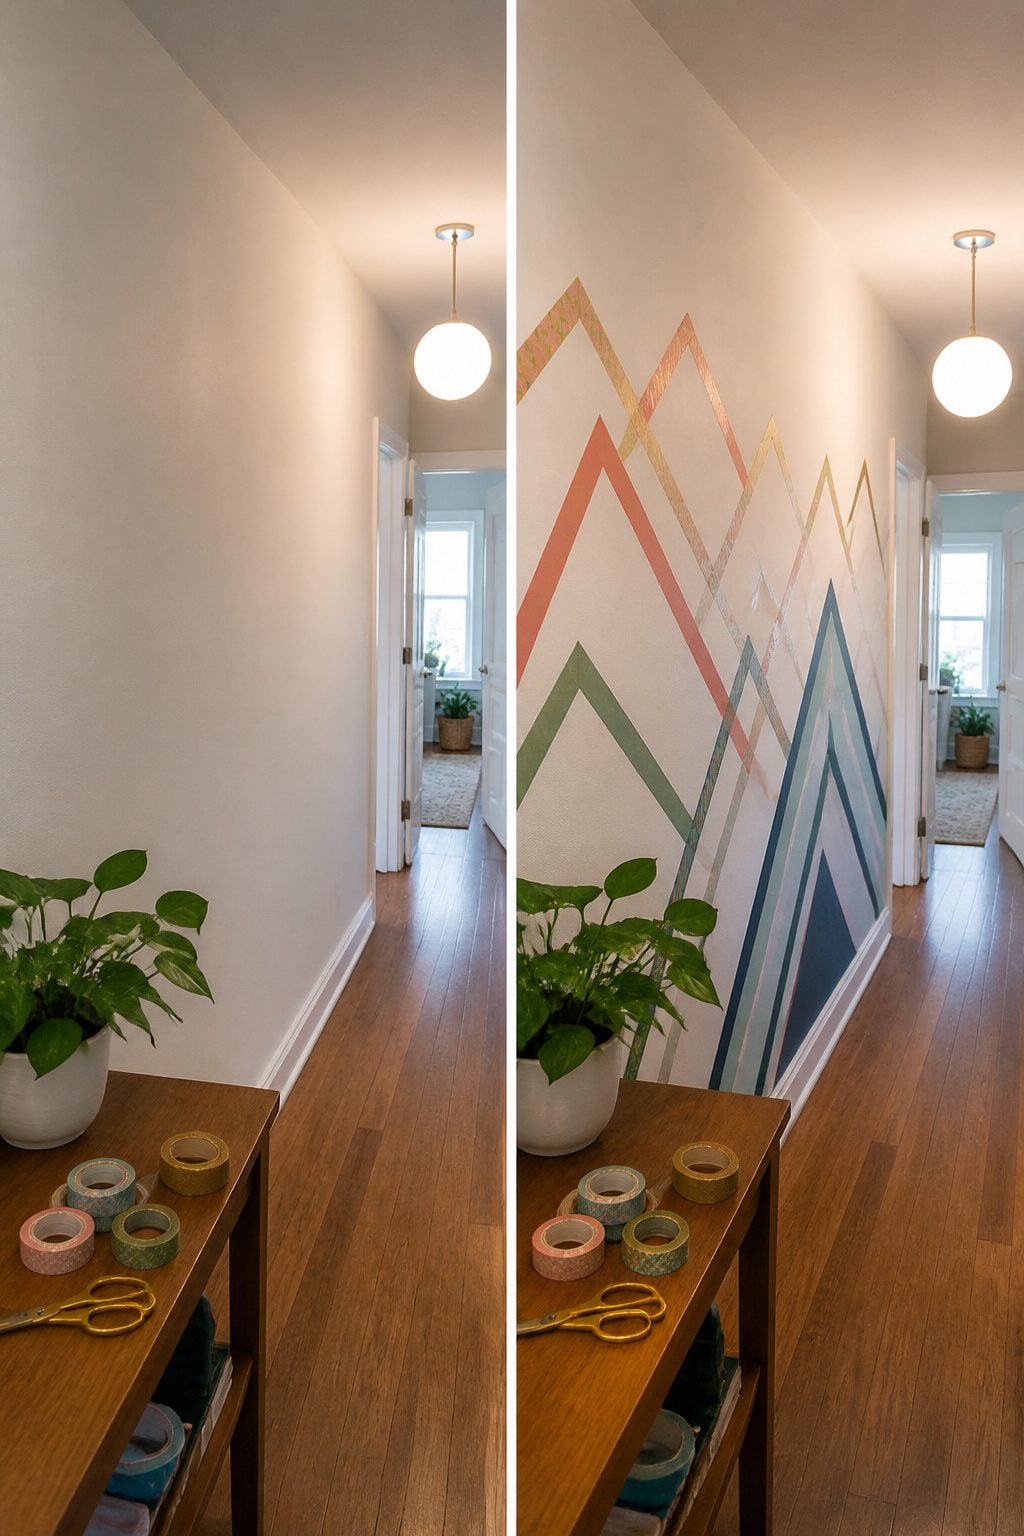
Washi tape peels off a satin or eggshell wall finish without a fight, but flat paint came up with the tape in one patch I tried. The difference is the binder in the sheen; flat paint sits porous and powdery, so the adhesive grips the pigment itself. After that mistake, I only use washi tape on walls with at least a little gloss to them.
The geometric pattern that hides uneven lines is a triangular mountain range or a chevron. Your eye reads the overall zigzag, not whether one peak sits a quarter inch lower than the next. I ran a mountain design along the top of my bedroom wall last spring, and the slight wobble in my hand only made the peaks look more hand drawn. Straight horizontal stripes, by contrast, broadcast every waver.
13. Upcycled Furniture
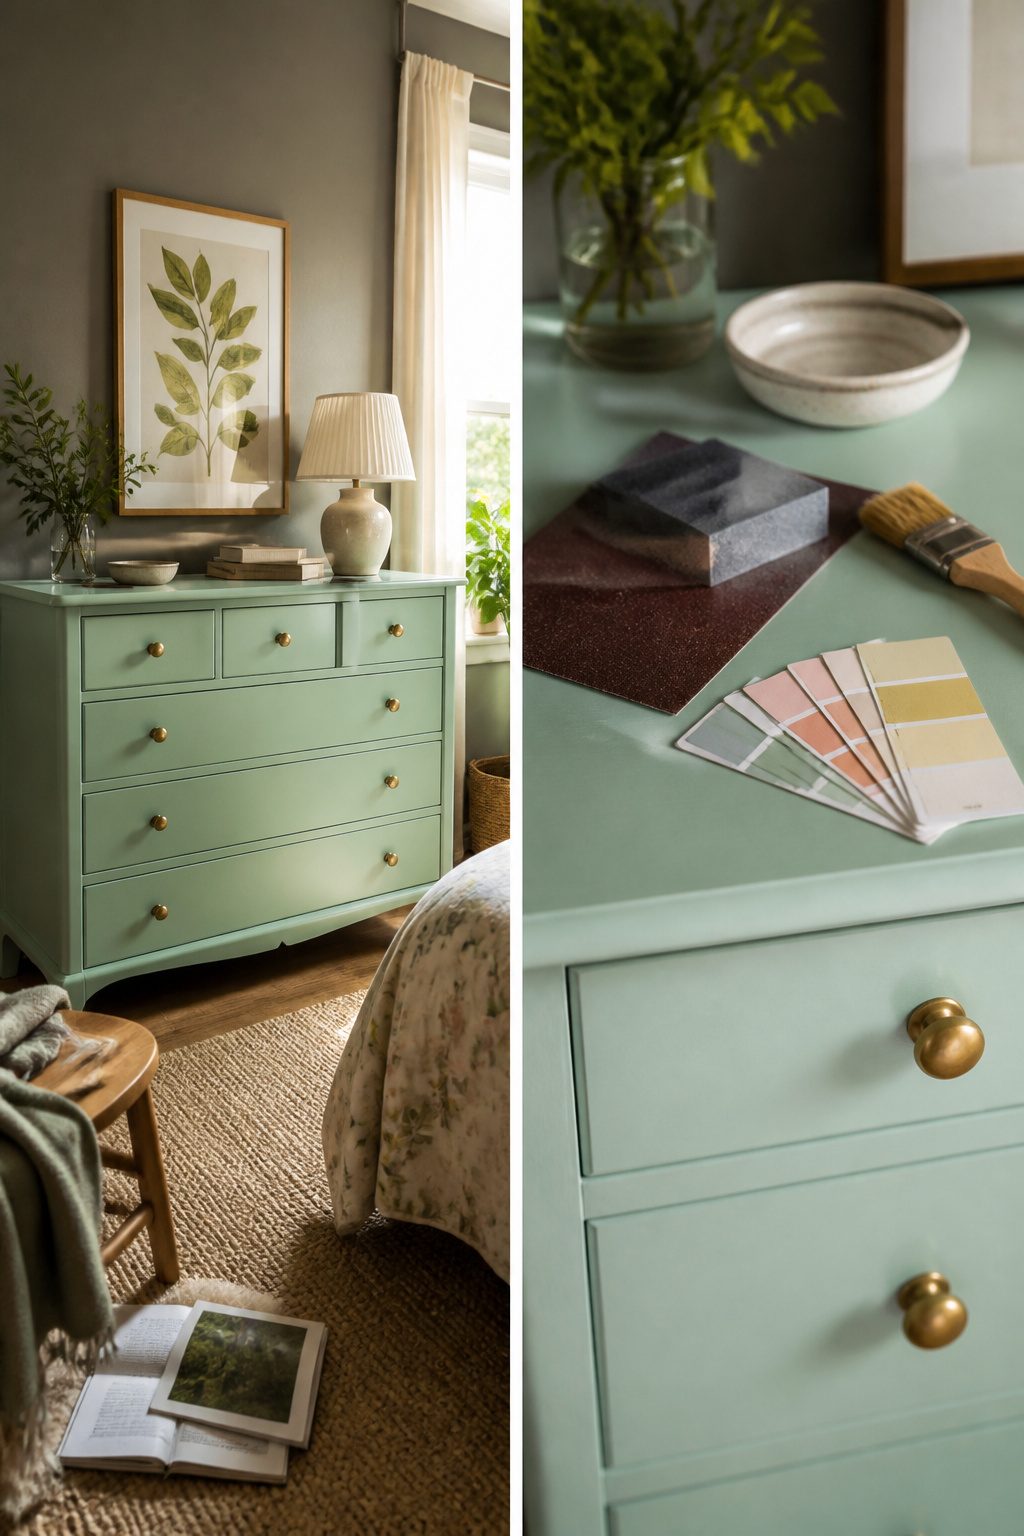
Laminate dressers are everywhere on the used market because the surface looks finished already, which also means paint wants to slide right off. The usual advice is to buy a bonding primer at nearly double the price, but a shellac-based primer sticks to slick laminate without that markup and dries fast enough to sand the same afternoon.
The real time sink is sanding. Most people start at 120 grit and work upward through three or four stages, which turns a Saturday project into a weekend-long ordeal. Jump straight to 220 grit after a single pass with 80, and the scratches level out in two coats instead of four. The surface feels rough enough for the primer to bite, but not so gouged that you are filling valleys for hours.
I learned the hard way that skipping the tack cloth after that 220 pass leaves dust that bubbles under paint. Ten seconds with a cloth costs less than sanding the whole drawer front back down.
14. DIY Candle Holders
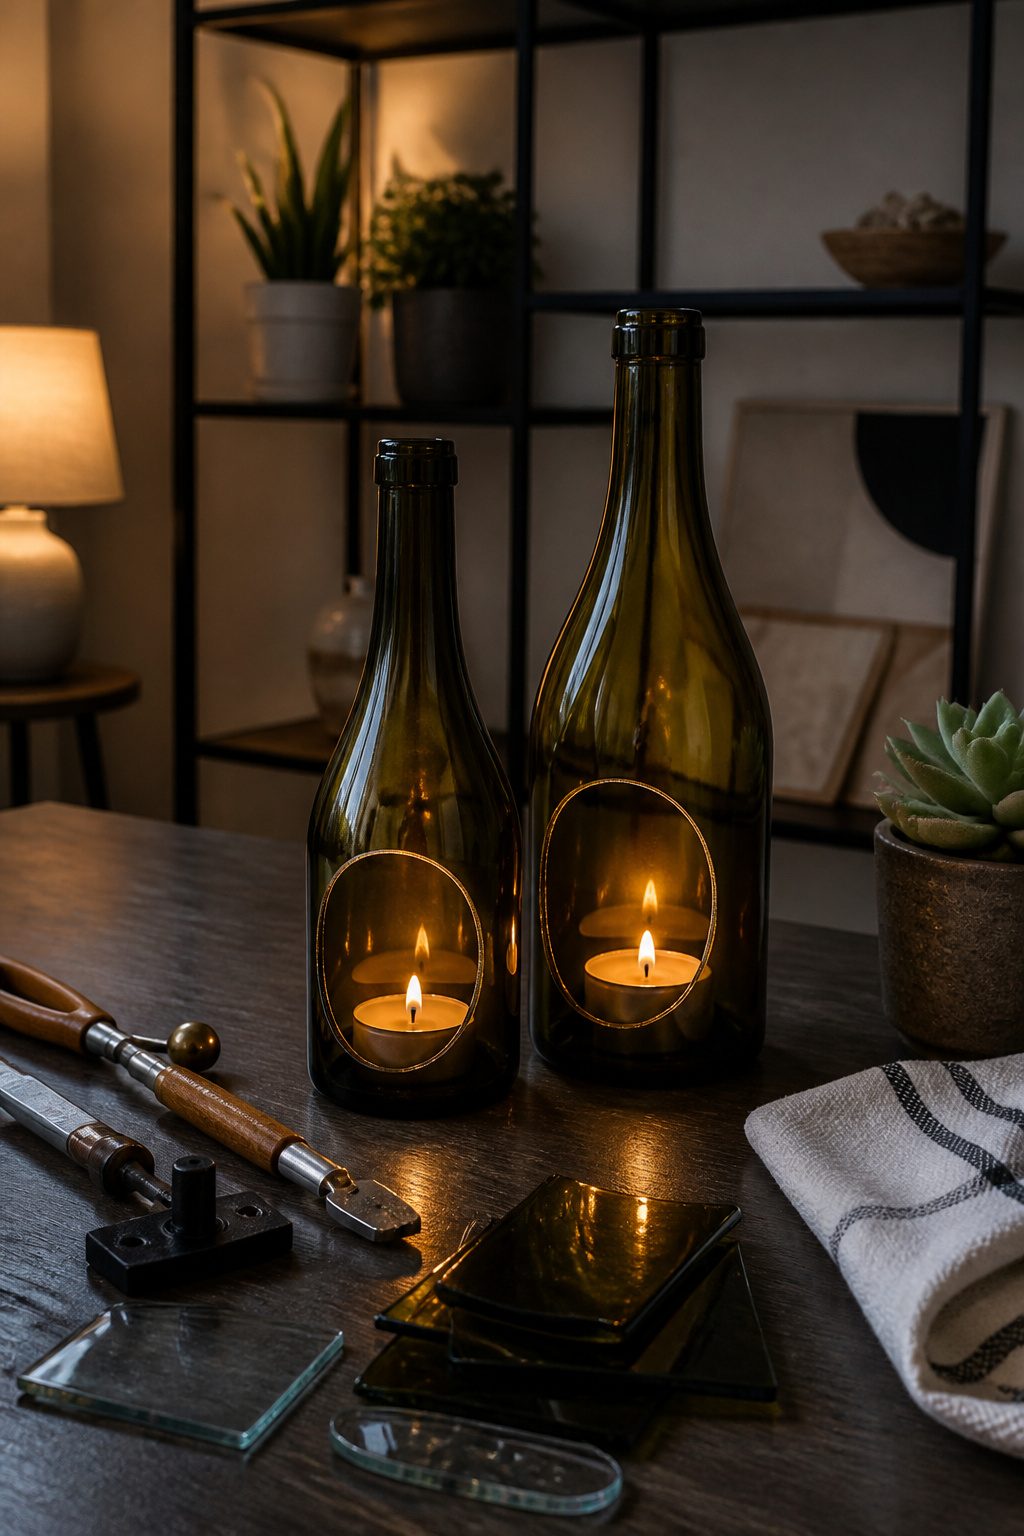
Glass bottles look elegant as candle holders until you try to cut them. I spent an afternoon with a Dremel and a diamond wheel, then another with the string-and-fire method I saw online. Both left edges that no amount of sanding would fix safely. The bottle opener that scores and splits glass with hot and cold water worked better, but the failure rate on thinner wine bottles was still about half.
Concrete was the alternative that actually stuck. A bag of countertop mix runs around eight dollars and sets smooth enough that you do not need specialty molds. I used empty yogurt containers as forms, oiled inside with cooking spray, and poured in layers around a tea light pressed into the center. The trick is tapping the mold hard for thirty seconds after each pour; otherwise you get honeycomb holes that catch wax and look like mistakes. After unmolding at twenty-four hours, a wet sand with 220 grit paper takes the industrial edge off without polishing away the texture that makes concrete interesting.
For the glass, the method that finally worked was skipping the cut entirely. A bottle with the bottom drilled out sits over a votive on any flat surface, chimney-style, and reads the same from across a room. A standard glass bit and patience, water to keep the temperature down, and you are through in about three minutes. No specialty bits, no flame, no cracked bottles in the trash.
15. Floating Shelves
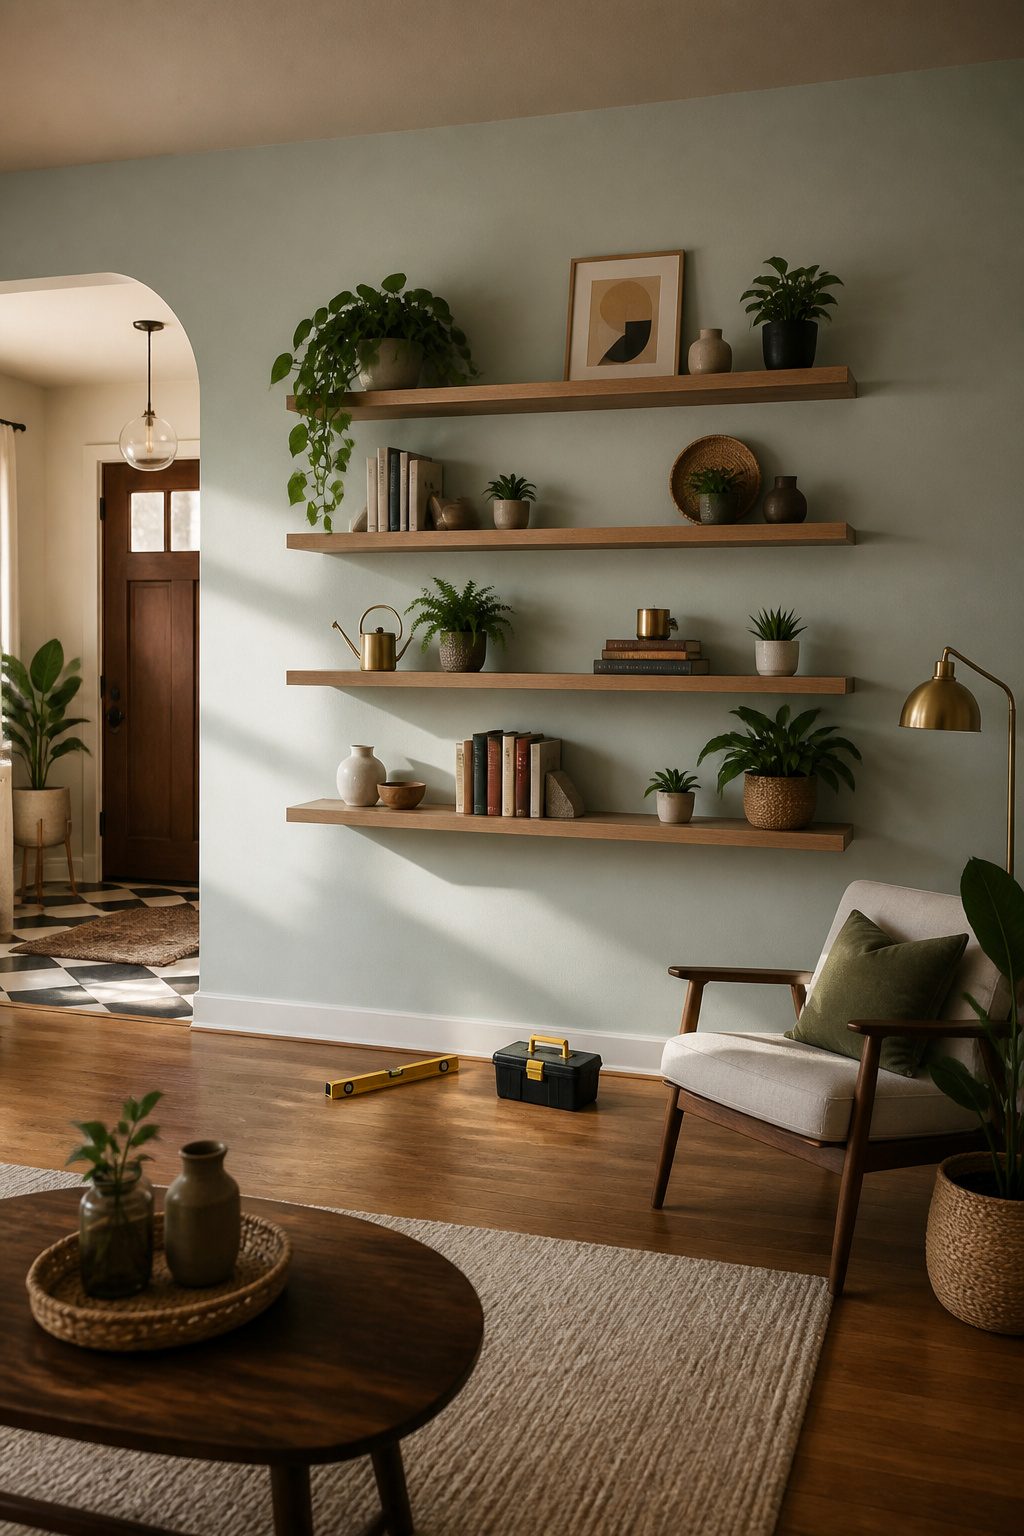
The hidden bracket type that holds 15 pounds without visible hardware is the one worth tracking down. I learned this after installing three sets in my last rental, and the clean look convinced me to skip the corbels and L-brackets entirely. The brackets slide into slots you rout into the shelf itself, so from below you see only wood.
My level lied on the first set. The bubble read true, but the shelf sat visibly off once loaded with books. Now I check with a water bottle set on the surface before I drive the last screw. If the water pools to one side, the shelf tilts that way, and the level gets retired to the junk drawer. A quarter inch over four feet is enough to notice, and the bottle catches it faster than any app or laser line I’ve tried.
The 15-pound limit means these work for paperbacks, small plants, a framed print, not a full kitchen load. For a weekend project under fifty dollars, that tradeoff keeps the wall looking built-in rather than bolted-on.
16. Gallery Wall
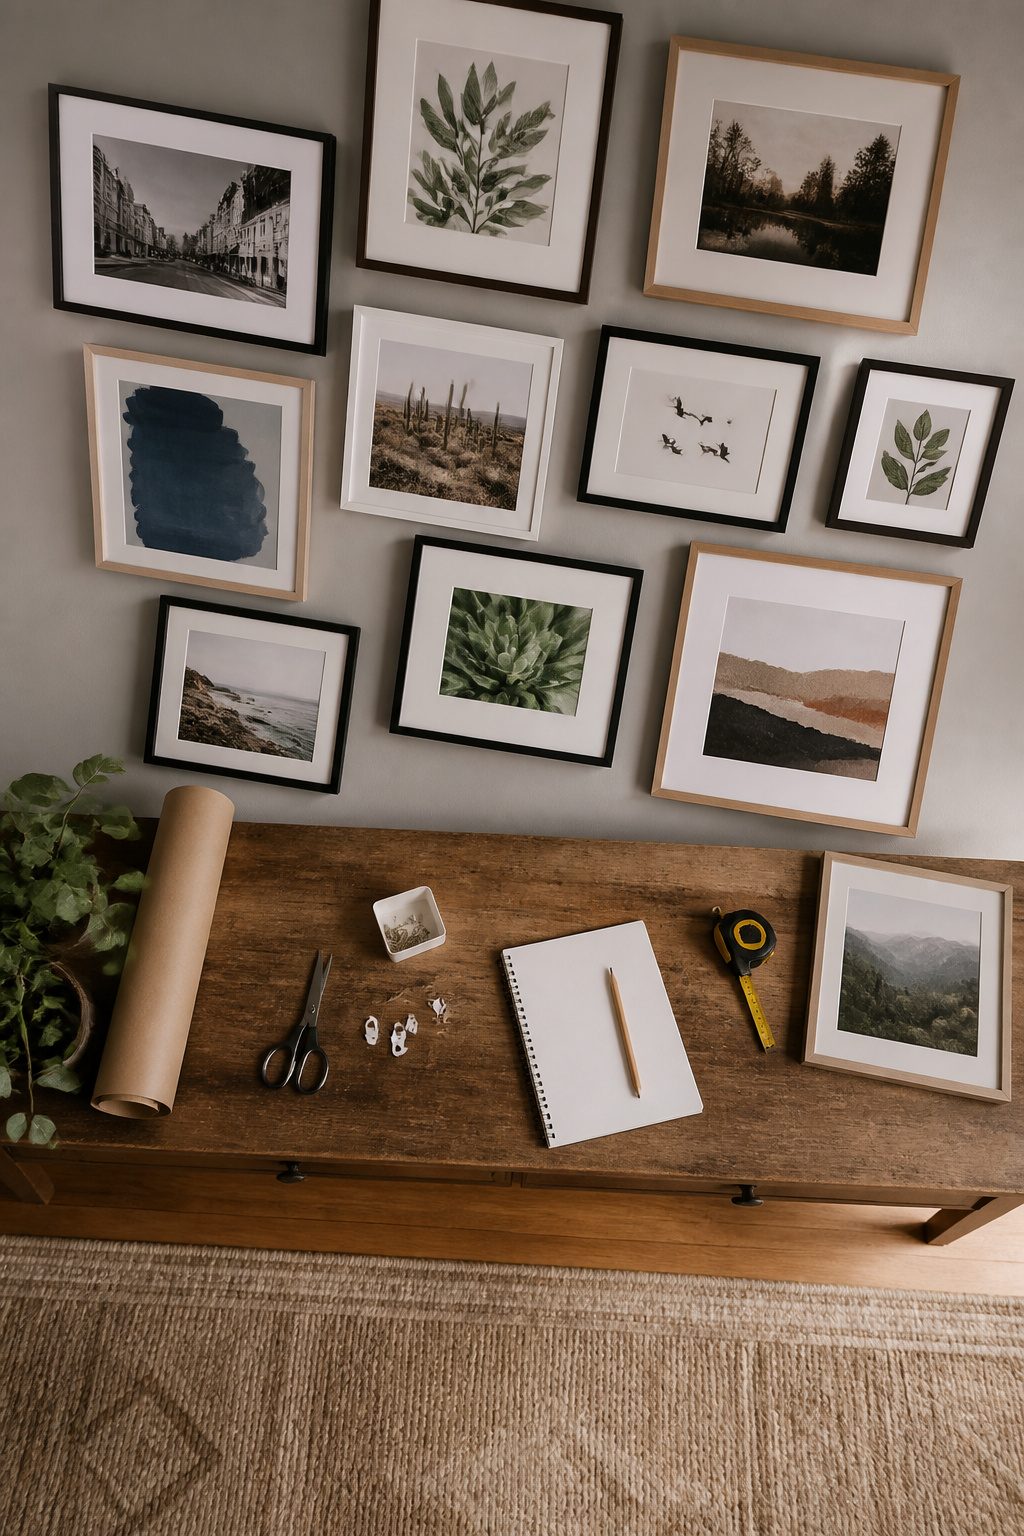
The paper template method saves your drywall from looking like Swiss cheese. Trace each frame onto kraft paper, mark where the hook sits, and tape the whole arrangement to the wall before a single nail goes in. Move the papers around until the spacing looks right, then pound straight through the marks.
I found my frames at a dollar-store adjacent outlet for $3 each, which left room in the budget for mats. The mat cutting went wrong fast. I bought a single bevel cutter and a sheet of cream mat board, measured twice, and still ended up with four crooked openings that looked handmade in the wrong way. A local frame shop now does the cutting for about $8 per opening, and the difference is the difference between a gallery wall and a garage-sale wall.
17. DIY Rustic End Table
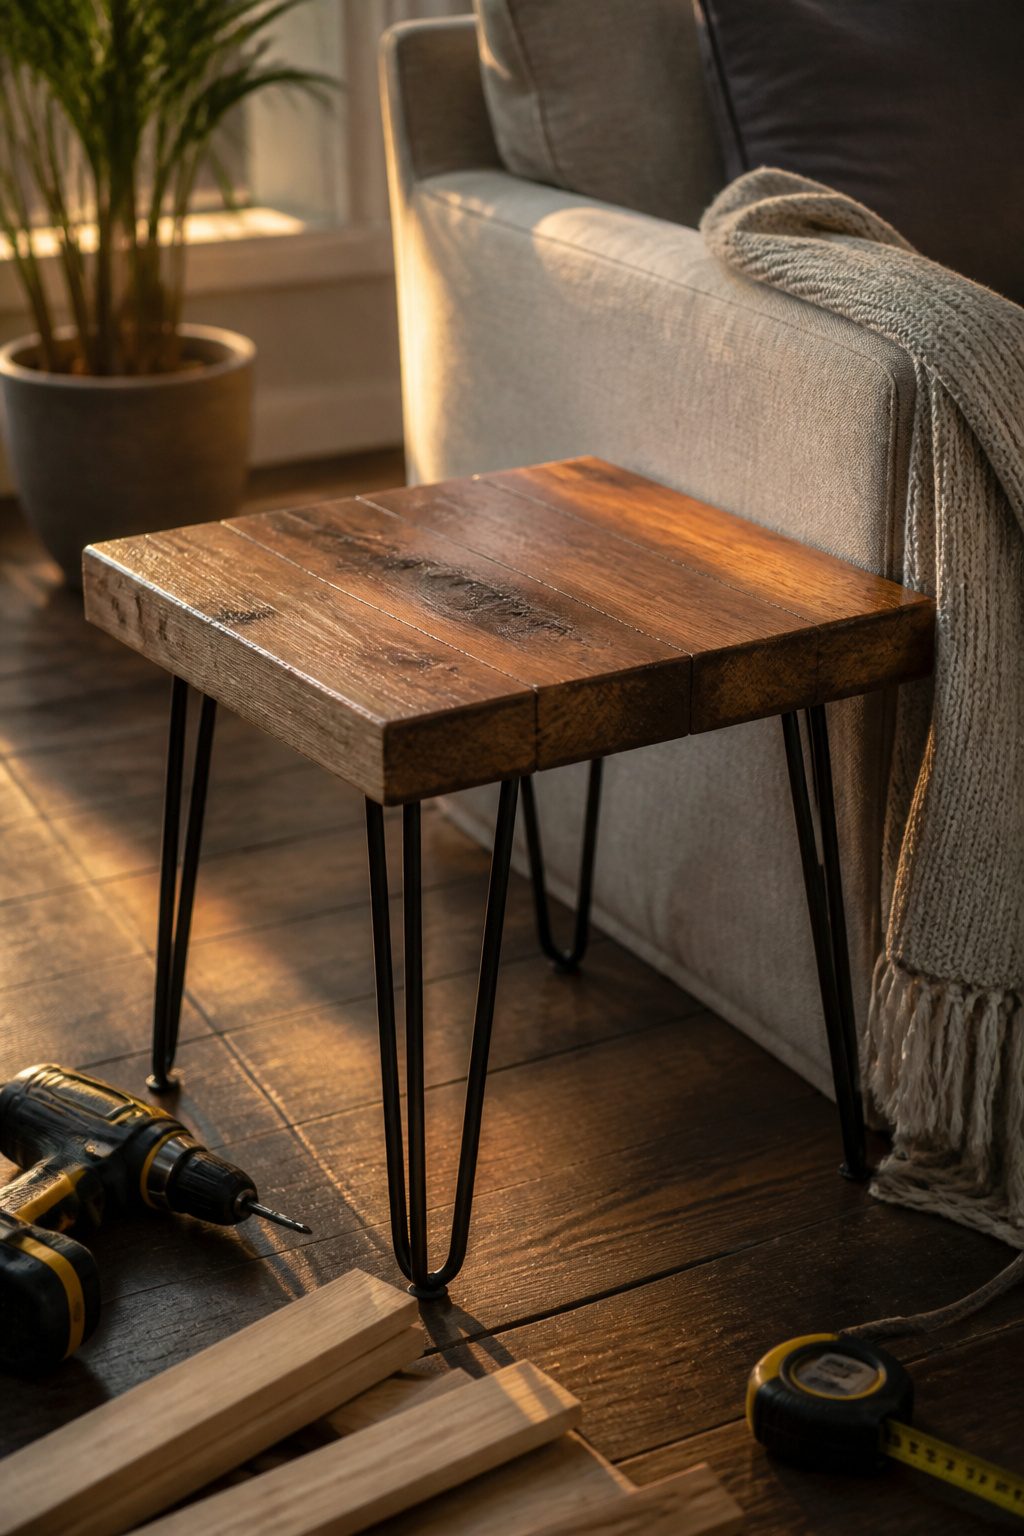
A small side table built from 2×2 lumber and hairpin legs lands around $45 to $50 if you already own a drill and a saw. The 2x2s run cheap at any home center, and a set of four 16-inch hairpin legs costs roughly half the budget. I cut four legs and four aprons to length, then drilled pocket holes to join them into a simple rectangular frame. The top is just more 2x2s laid flat and spaced an eighth of an inch apart for drainage if it sits on a porch, though mine lives next to the sofa.
Stain went blotchy on my first attempt because soft pine sucks up pigment unevenly. The fix was a wood conditioner applied with a rag ten minutes before the stain. That step added four dollars and fifteen minutes, but the second coat went on uniform enough that I skipped a third. I finished with two coats of matte polyurethane, sanding lightly between them with 220 grit. The whole build took a Saturday morning, and the table weighs maybe twelve pounds, light enough to move when the vacuum comes out.
18. Decorative Photo Frames
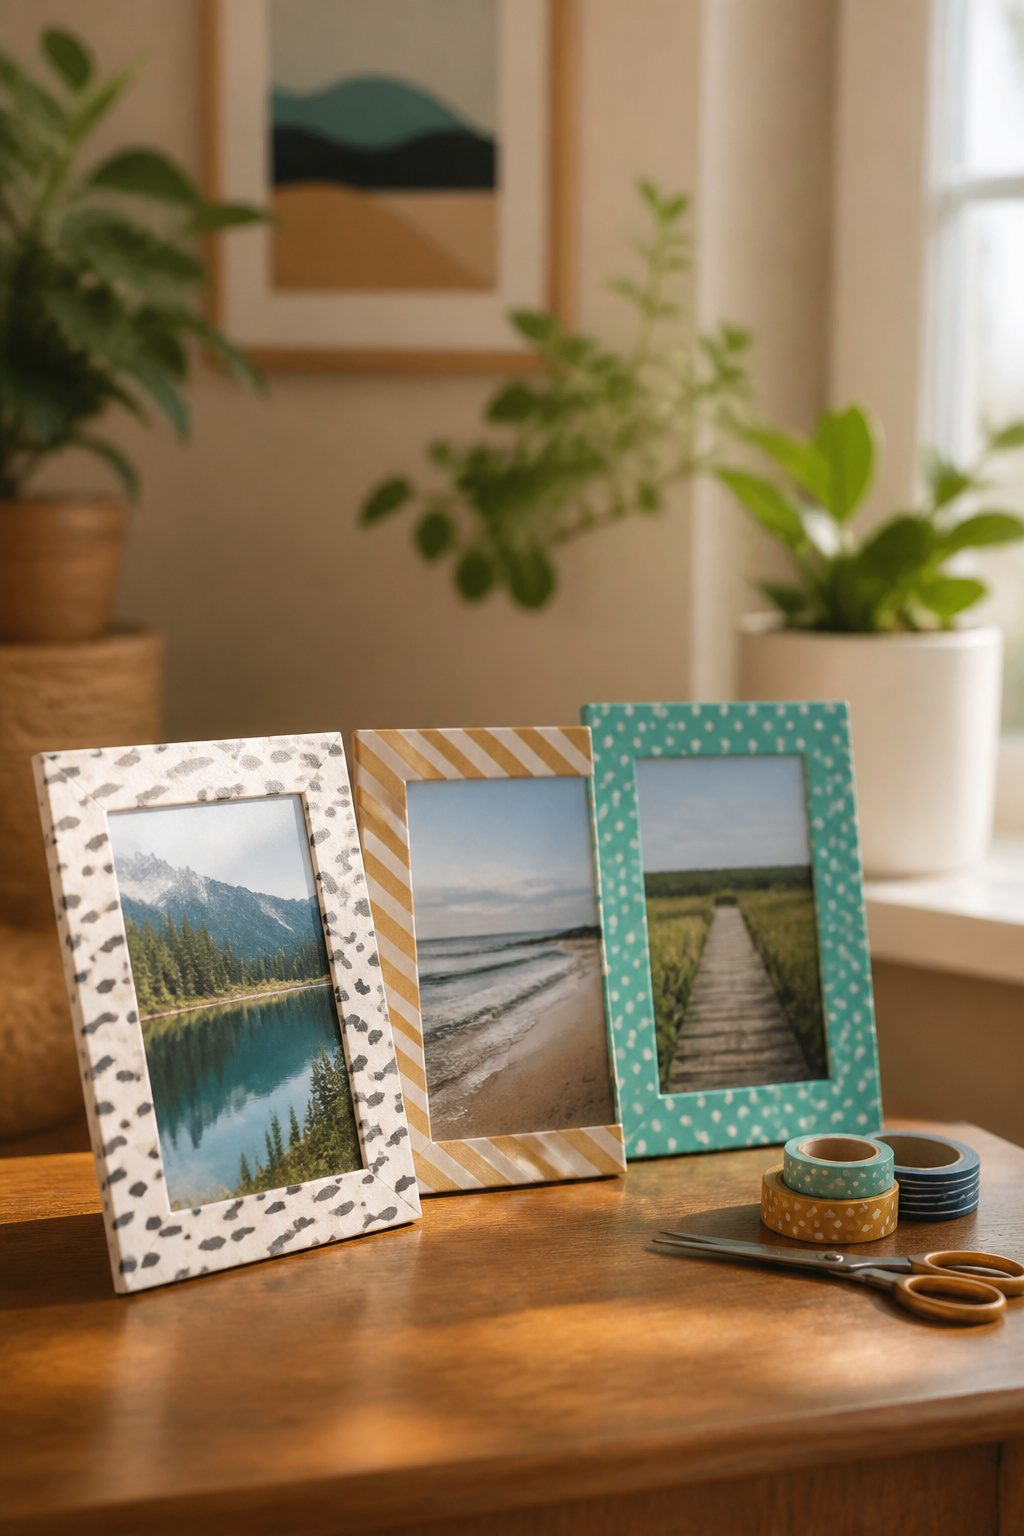
A standard mat board runs eight to twelve dollars per frame, which adds up fast when you are building a gallery wall. Dollar store foam board cuts to size with a utility knife and passes for the real thing from three feet back. The trick is the edge. Raw foam board reads as craft-project white, so I ran a strip of washi tape around the inner rectangle to fake a bevel. The first frame I tried this on, I picked a tape with tiny polka dots that looked intentional in the roll and childish once it was up. Solid metallic or a thin stripe pattern works better; the pattern should read as texture, not as decoration competing with the photo.
19. DIY Headboard for Under $15
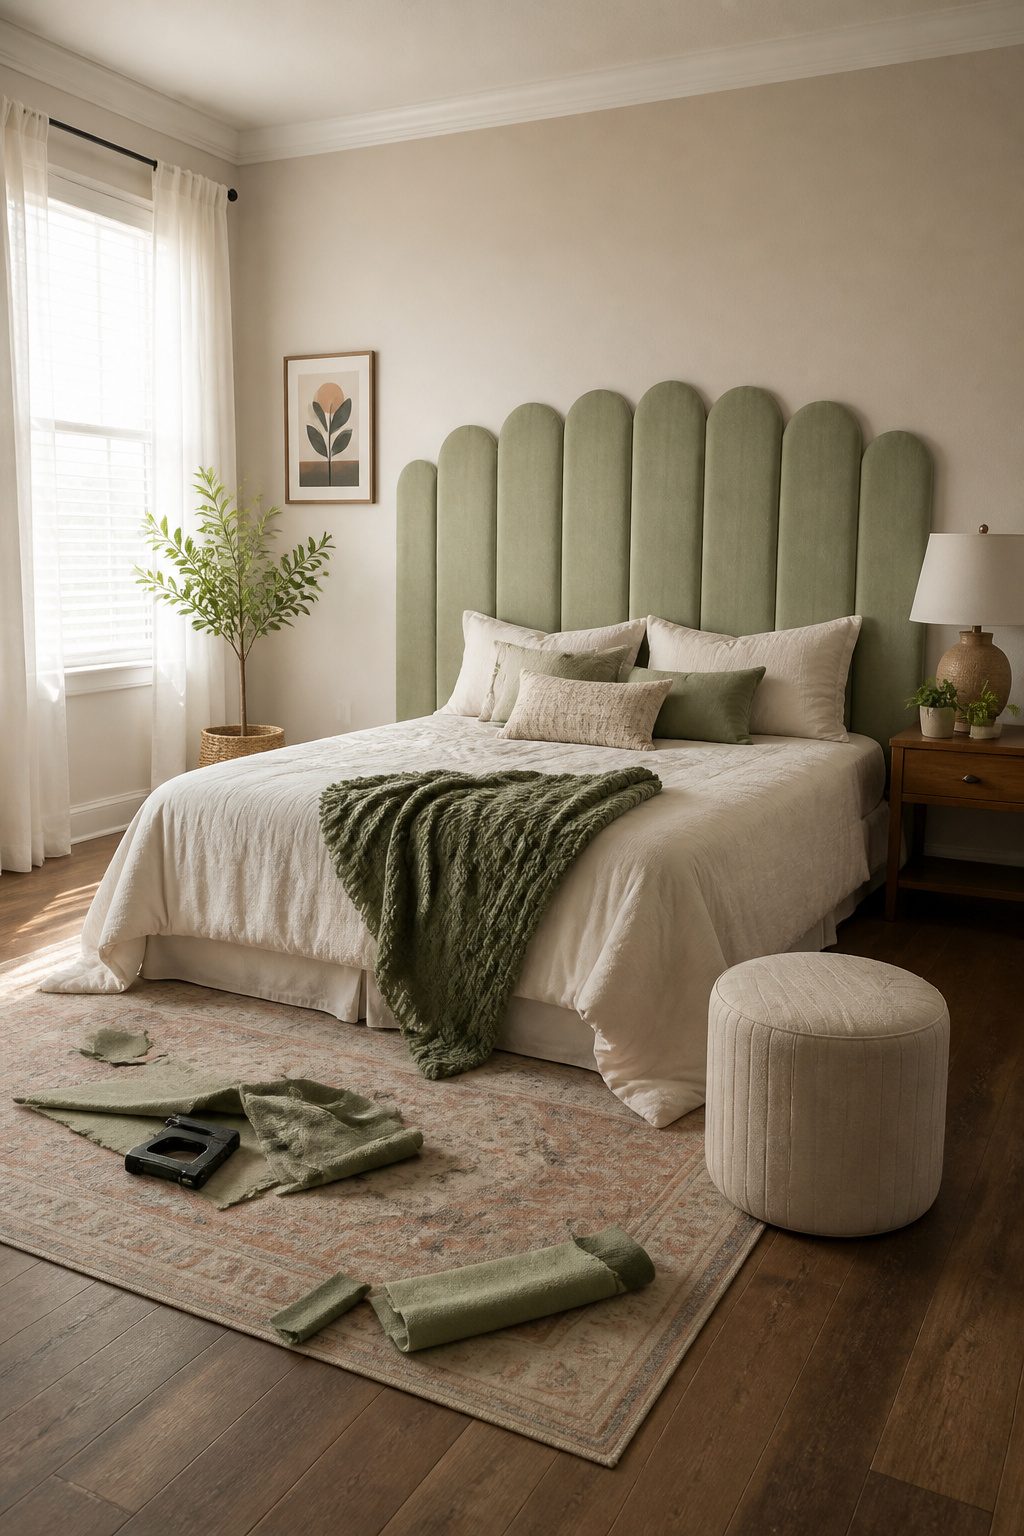
Peel-and-stick foam panels from the hardware store gave the wall behind my bed some actual shape without drilling into the landlord’s drywall. The trick was finding a single piece of fabric wide enough to cover the whole headboard in one go. Most bolts top out at 54 inches, which leaves an ugly seam on anything queen-sized. A discount outlet near me carries 60-inch decorator remnants by the pound, and one of those lengths, a heavy linen-look polyester, stretched edge to edge with no join.
The staple gun jammed on the third side, which seems to happen every time the staples are even slightly longer than the gun’s rated capacity. Switching to a manual tack hammer and 5/16-inch staples was slower but cleaner. The heads sit flush without that half-cocked angle pneumatic tools leave when they misfire. Total came to about $14, mostly the panel pack; the fabric remnant was under four dollars because the dye lot had been discontinued.
20. DIY Floor Cloth
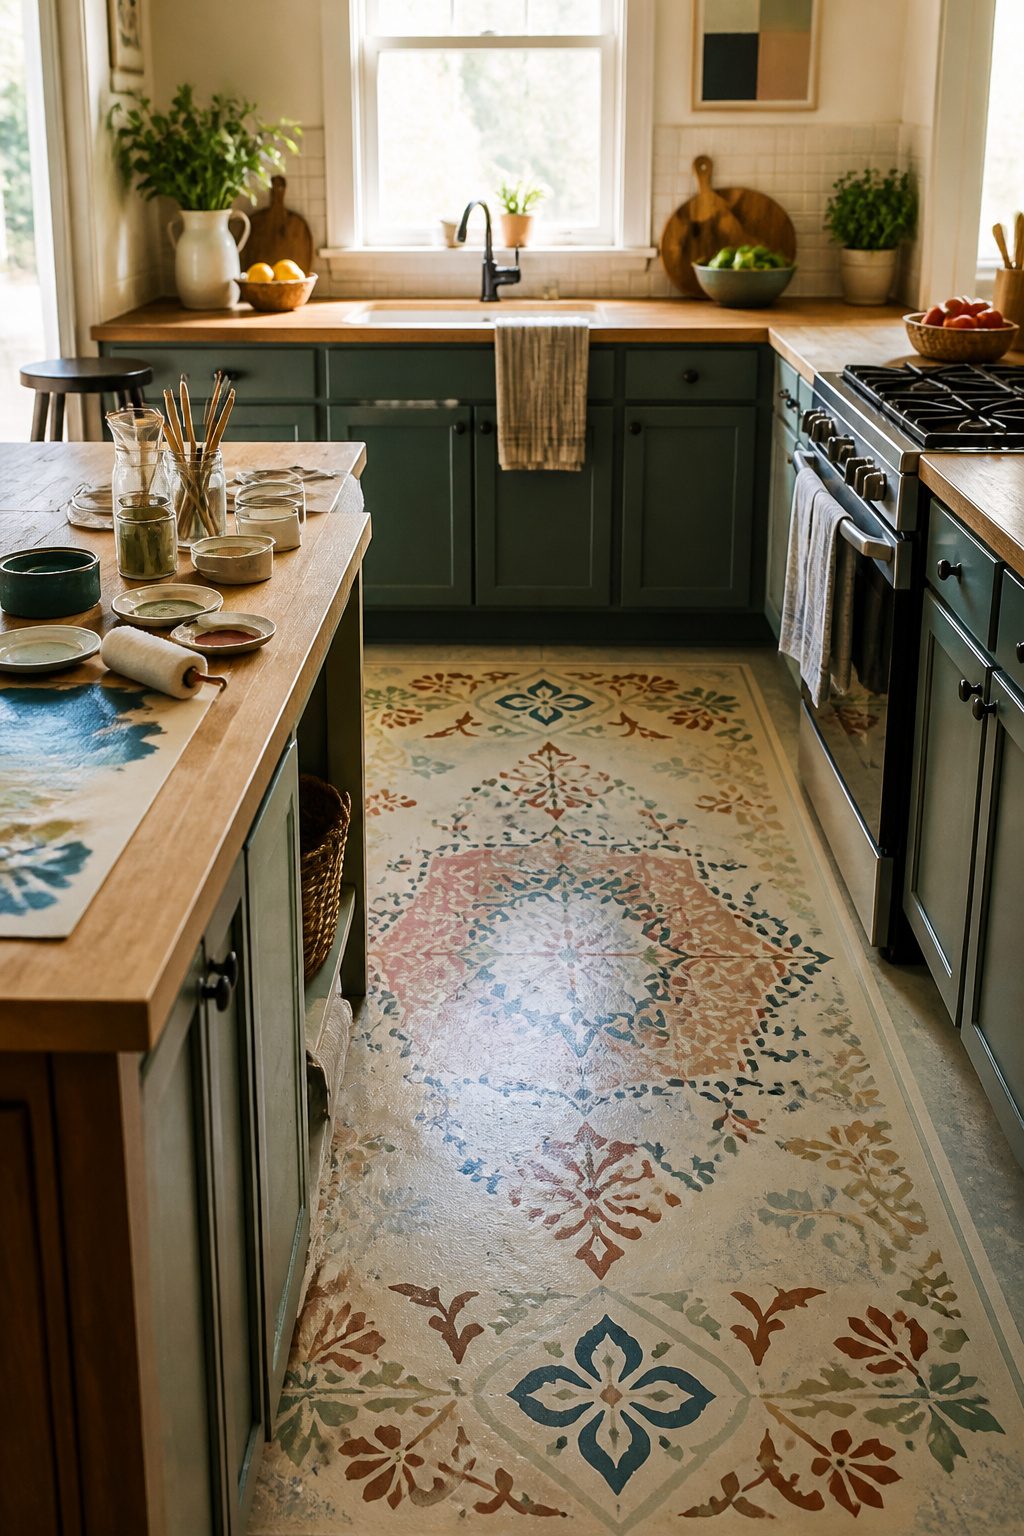
Vinyl remnants from a flooring store make the cheapest possible canvas for a painted floor cloth that actually holds up to a vacuum. The heavier the remnant, the less it will curl at the edges, so ask for the 6-foot rolls rather than the thin sheet stock. I prime with two coats of exterior latex, paint the design in acrylics, and seal with polyurethane. The first poly I tried was a water-based floor finish that stayed flexible enough to roll the cloth up and move it without a single crack across the fold. A later batch with a standard oil-based varnish cracked every place the vinyl bent. Flexibility matters more than hardness for anything that will be rolled or walked on. The finished cloth mops clean, vacuums without lifting, and weighs enough to stay flat without rug tape.
21. DIY Desk Using a Door
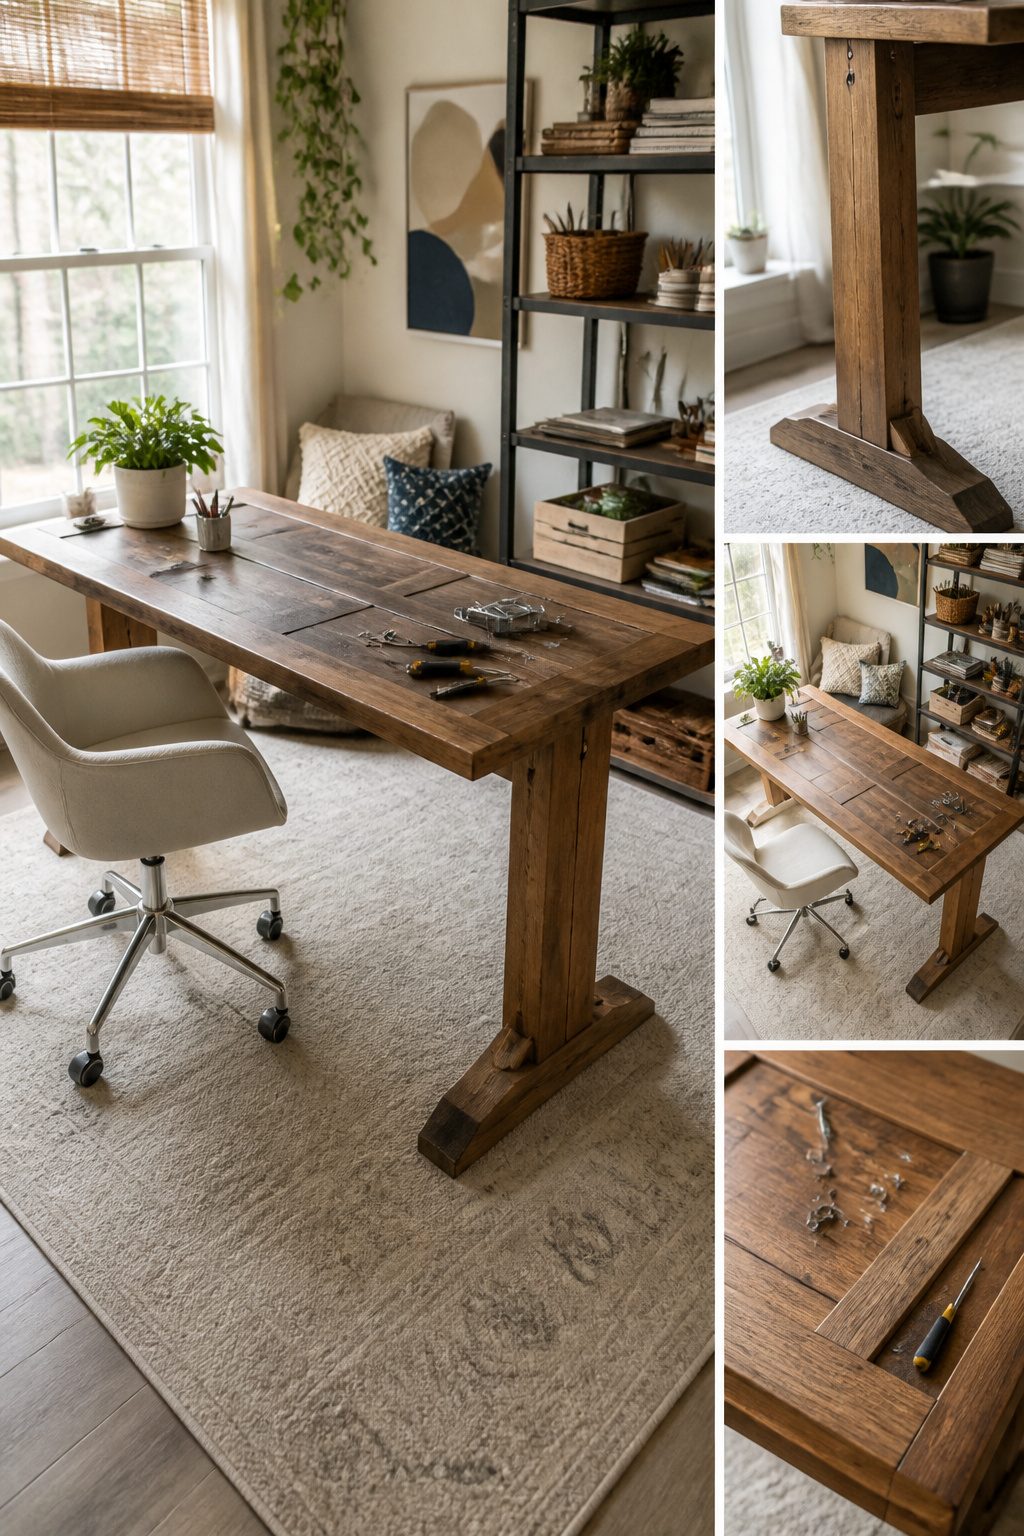
A hollow-core door keeps the weight low enough to move alone, but the thin edges split the minute you drive a screw straight in. Solid wood or a slab-style door fixes that, though it costs more and needs two people to flip. Either way, the fix is the same: drill a pilot hole, then sink the leg plate with a washer so the load spreads past the particleboard rim.
The panel seams are the giveaway. A door finished in plain paint reads as exactly what it is. What worked for me was a dark gel stain wiped thin, then buffed back. The seams stay visible up close, but at desk distance they fall into the grain pattern and the whole surface looks intentional. Two coats of wipe-on poly over that, and the edges seal flat without the plastic look of thick varnish.
I spent one Saturday on the build, another on the finish curing. Under a hundred dollars if you find the door at ReStore; add thirty for legs and hardware.
22. DIY Wall Planters
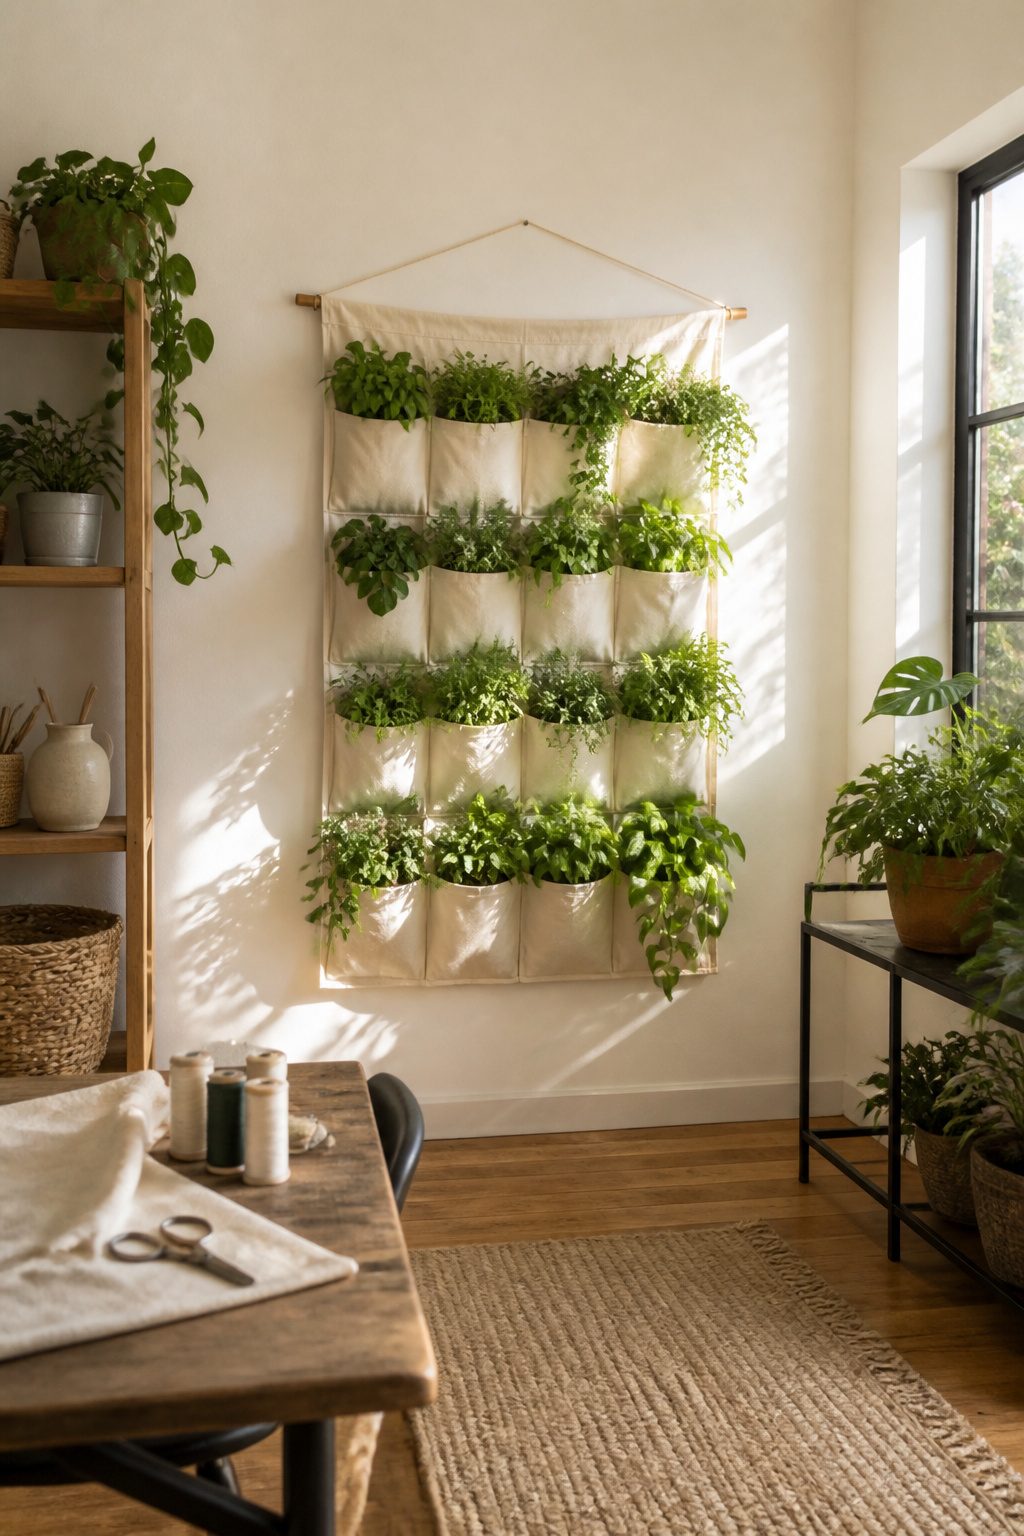
Felt pockets stitched from heavyweight canvas or dense wool felt keep soil off the wall without the bulk of a rigid box. The fabric wicks excess moisture downward instead of letting it pool against drywall, and a plastic liner slipped inside catches any seepage before it reaches the backing. I stitch three sides, leave the top open with a rolled hem, and add a row of grommets across the back flap for hanging.
Command strips rated for five pounds or more hold the weight when the pocket is empty; fill it after it is on the wall so the adhesive cures flat. In my last rental, two strips per pocket kept three planters anchored through a humid summer, and the strips peeled off clean at move-out. A small bar across the top, screwed into a stud, is the sturdier option if the lease allows it and you own a drill.
23. DIY Coasters
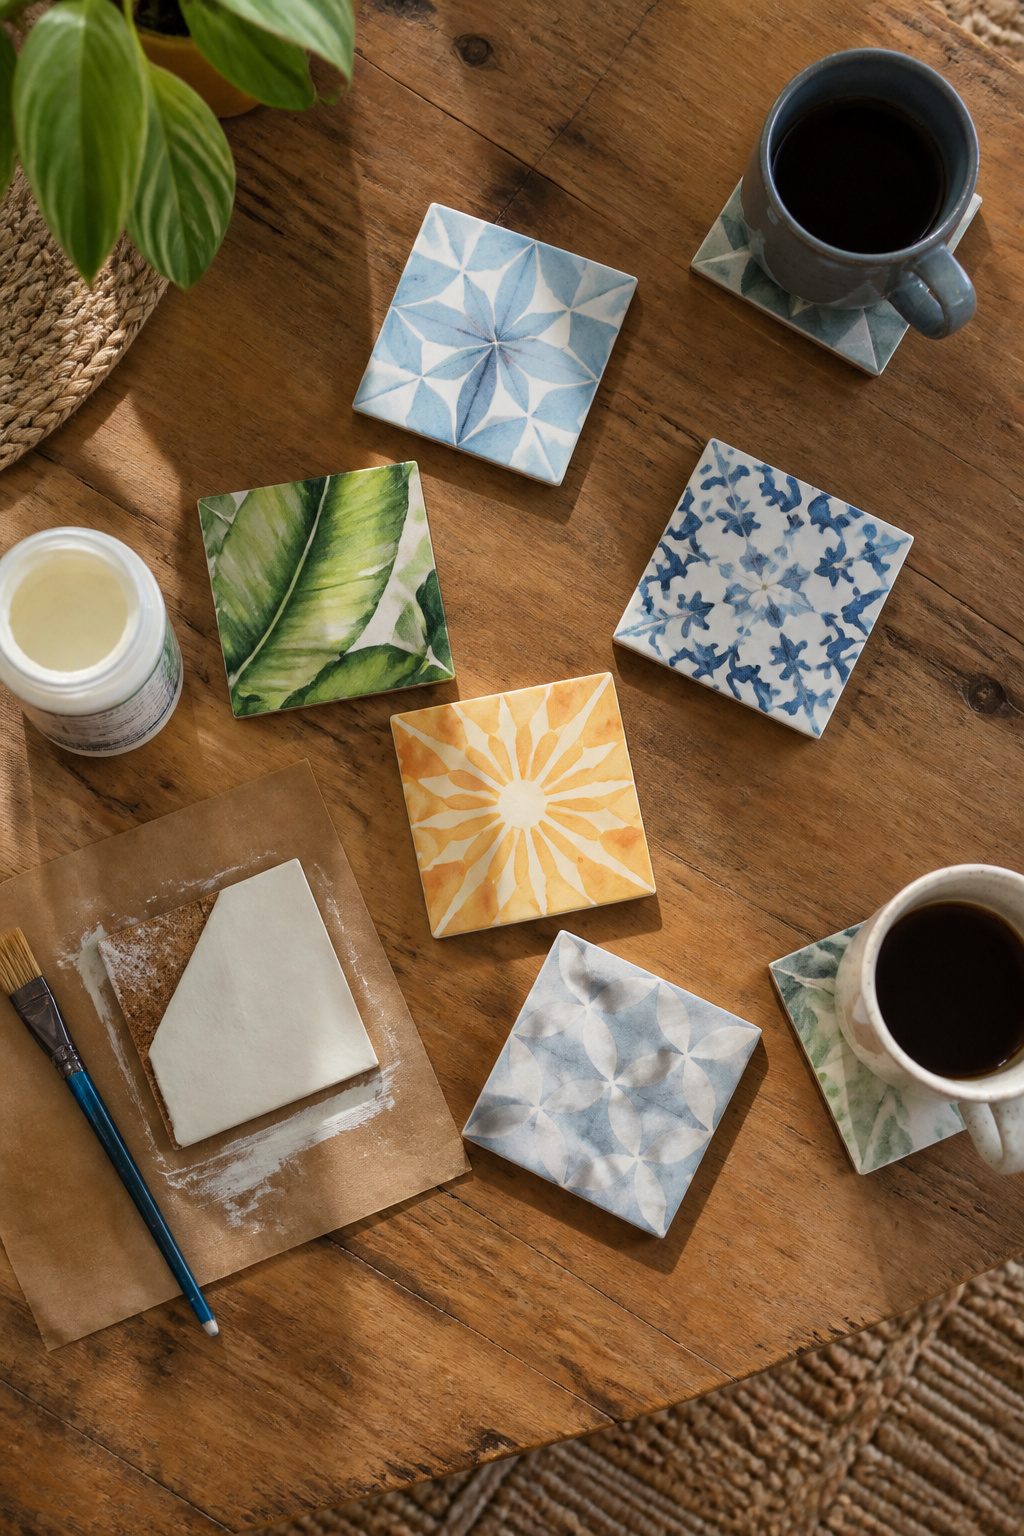
Tile coasters with cork backing run about $0.50 each if you catch a hardware-store sale on 4-inch squares, and the whole set fits in one afternoon. The cork keeps them from scratching the table, but the real trouble is the glaze. Water beads on sealed ceramic for a while, then finds its way through hairline cracks and leaves a ring anyway. After three months of coffee mugs, the ones I gave a second coat of polyurethane meant for bar tops stayed bone-dry underneath while the single-coat set started weeping.
Wood slices look warmer and cost nothing if you know someone with a downed branch, though sanding them flat takes longer than the whole tile build. They also split across the grain when the heater kicks on in October, which limits them to decorative use or to guests you warn ahead of time.
Resin pour coasters photograph well for Pinterest, and the pigment options are genuinely fun. The catch is the three-day cure and the fact that a first batch usually traps bubbles you only notice once the mold is set. For a weekend project with a hard stop, tile wins. For a gift when you have lead time, resin is worth the wait.
24. DIY Fabric Tapestries
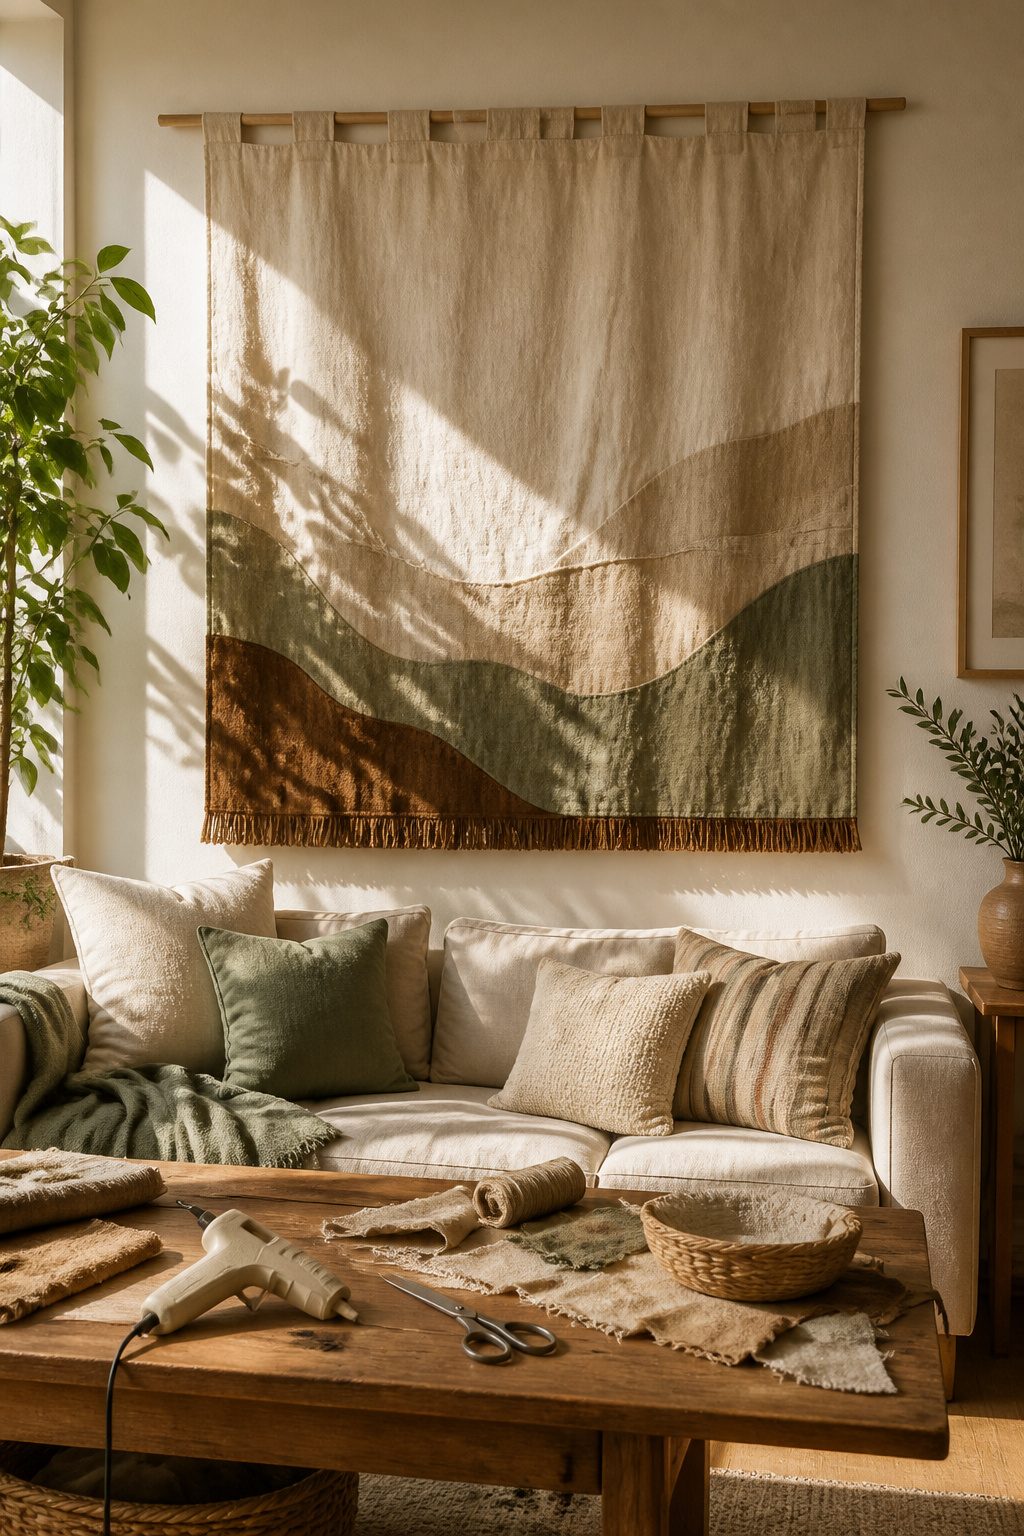
A wide bolt of linen from the fabric store runs about 54 inches across, which is enough to fill the blank wall above a sofa without cutting or hemming anything. I hang these with a 1-inch dowel rod slipped into a pocket folded over at the top, secured with a line of hot glue pressed between the layers. The rod sits on two large Command strips rated for sixteen pounds each, and that rating assumes a load pulling straight down, not the slight outward tug of fabric hanging in space. The first tapestry I tried this way hit the floor at three in the morning, so now I use four strips in a wide spread, or switch to a single nail if the wall allows it. The dowel method still wins for renters, but the strips need redundancy, not trust in the package number.
25. DIY Lace Mason Jars
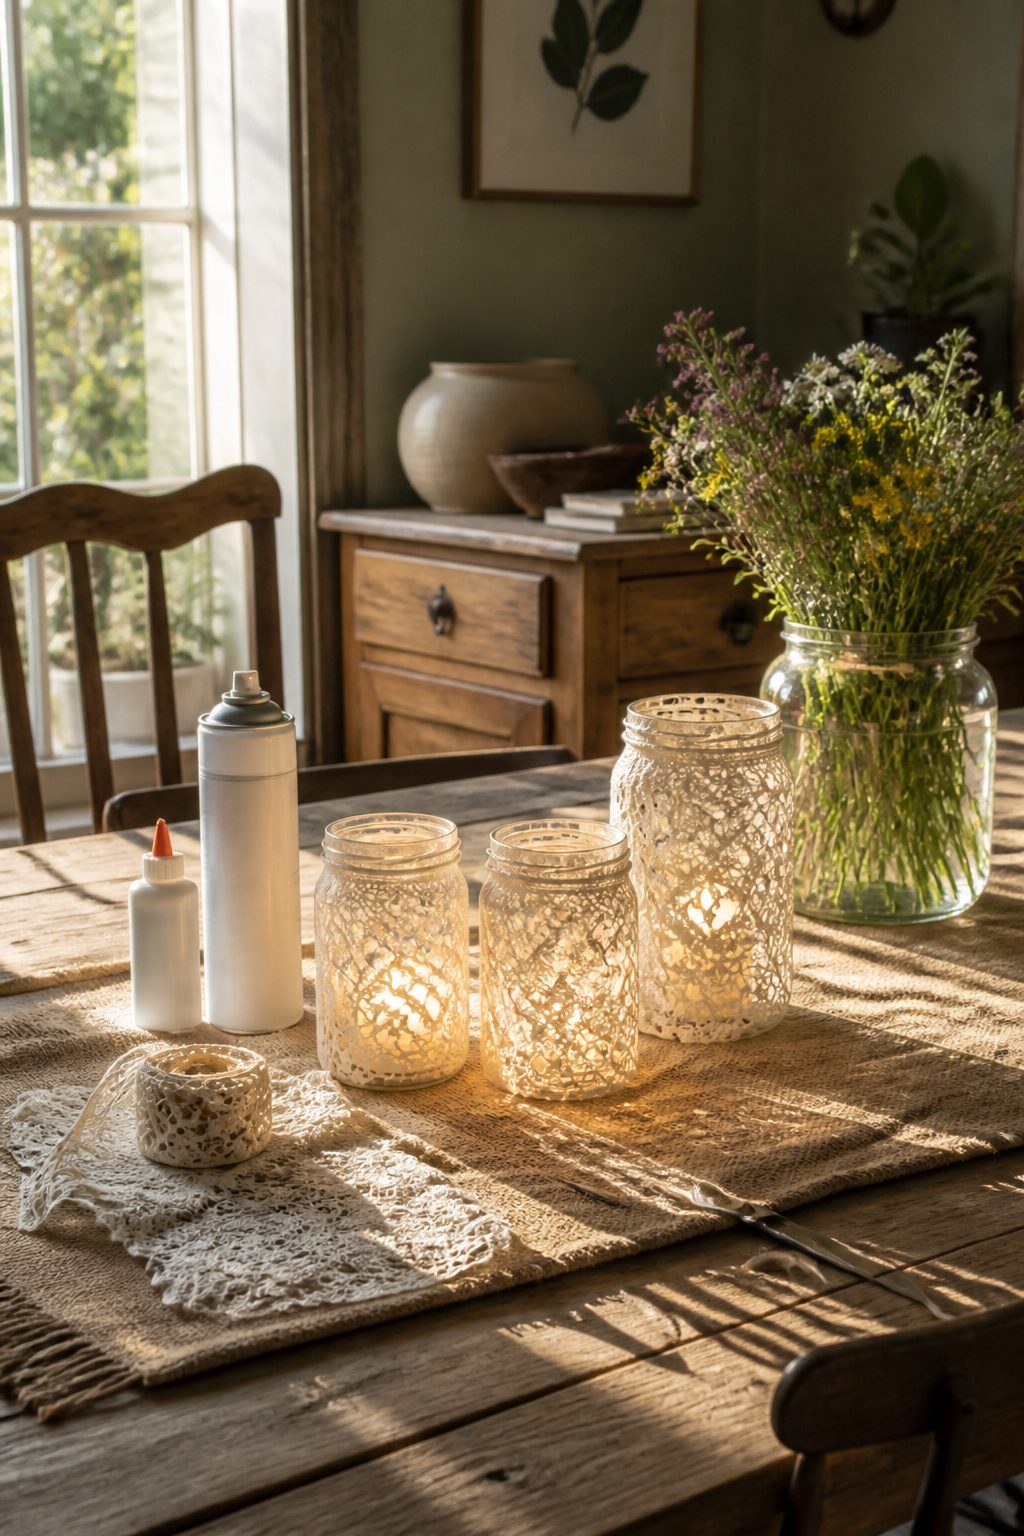
Lace on a curved jar fights you every step of the way. The trick that finally worked was running a thin bead of glue down the center strip of the lace first, pressing that spine flat against the glass, then working outward in quarters rather than trying to smooth the whole piece at once. The lace still buckled slightly at the bottom curve, but the center held firm enough that the ruffles looked intentional.
I used spray frost to dull the glass behind the lace, and the first coat went on heavier at the top where I started spraying. The second coat evened it out some, but the pattern stayed denser up there. A reader scanning for the fix should know: hold the can level and start each pass off the jar, not on it.
The real failure came later. A tea light sat inside long enough to warm the glue through the glass, and the center strip softened and slid a half inch down the side. Battery candles solve this completely. The warm glow is nearly the same, and the lace stays where you put it.
26. DIY Hanging Organiser
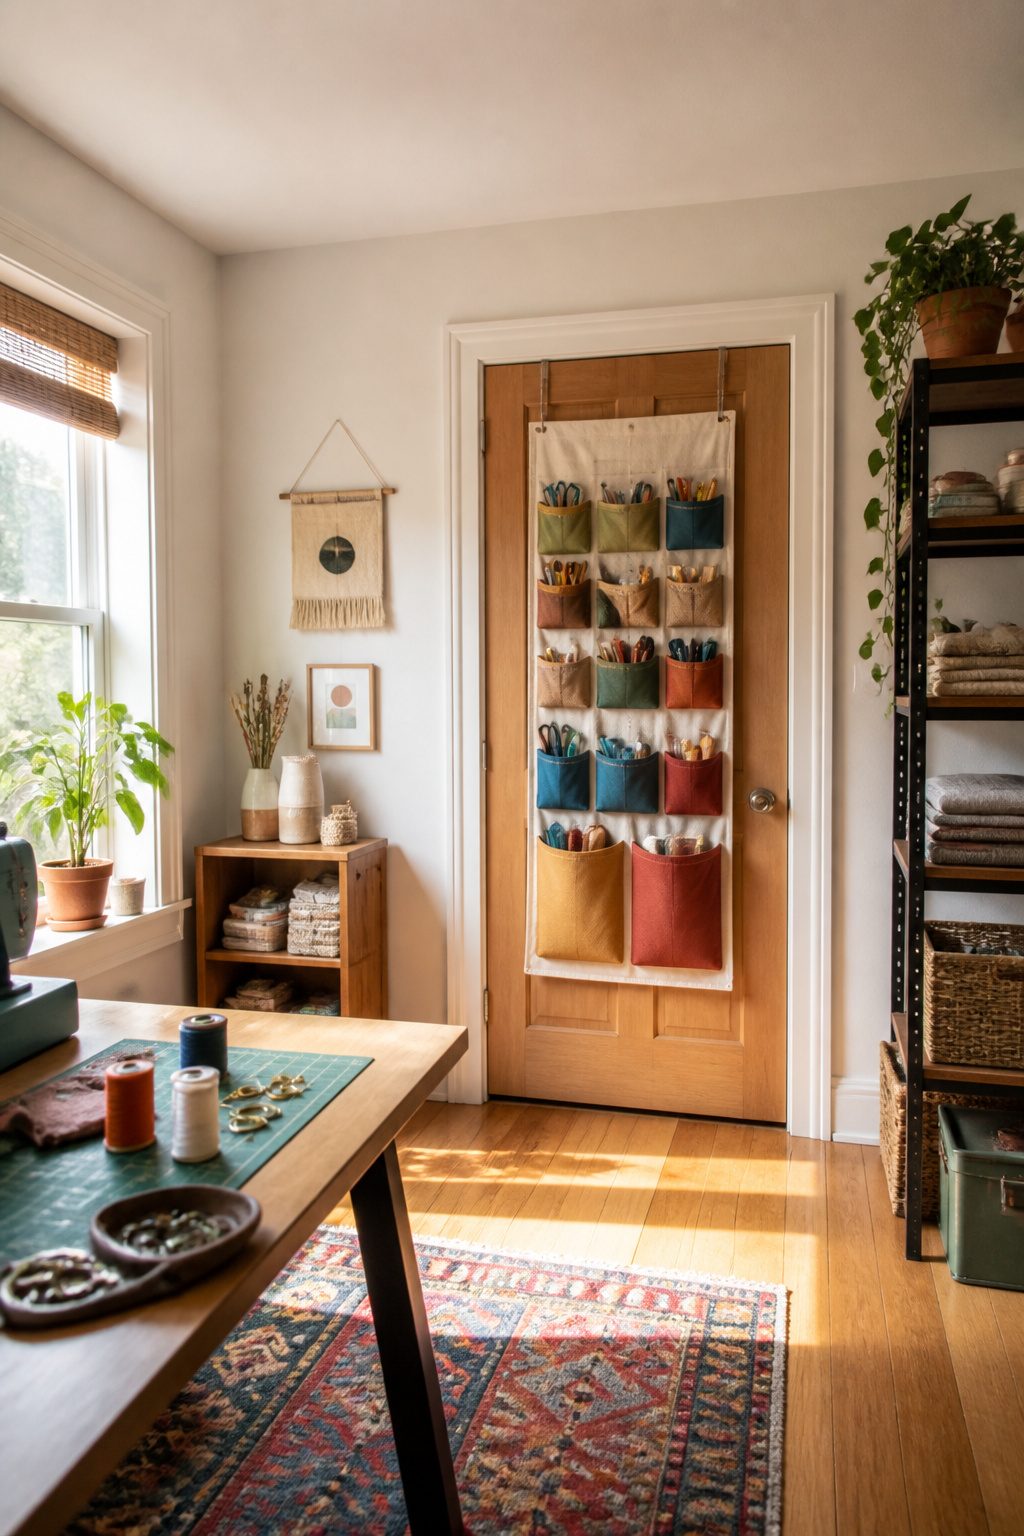
A clear over-door shoe organizer works until the pockets sag or the hooks chew the paint. Canvas strips sewn into channels solve both problems, and the finished piece looks like something you meant to hang rather than something you repurposed. The first one I made used a 3/4-inch dowel rod, which bowed under the weight of a water bottle and a few magazines. A one-inch diameter rod, or better still a one-inch closet rod, holds straight even with tools or cleaning supplies loaded in every pocket. I spaced the canvas channels about eight inches apart, deep enough for a spray bottle or a rolled hand towel, and left a two-inch hem at the top so the rod sat inside the fabric rather than against a raw edge. Grommets are optional; a simple sleeve is faster and the rod slides out for washing. The whole project takes a single yard of canvas and about an hour of machine sewing, which puts it well inside a Saturday morning.
27. DIY Wall Murals
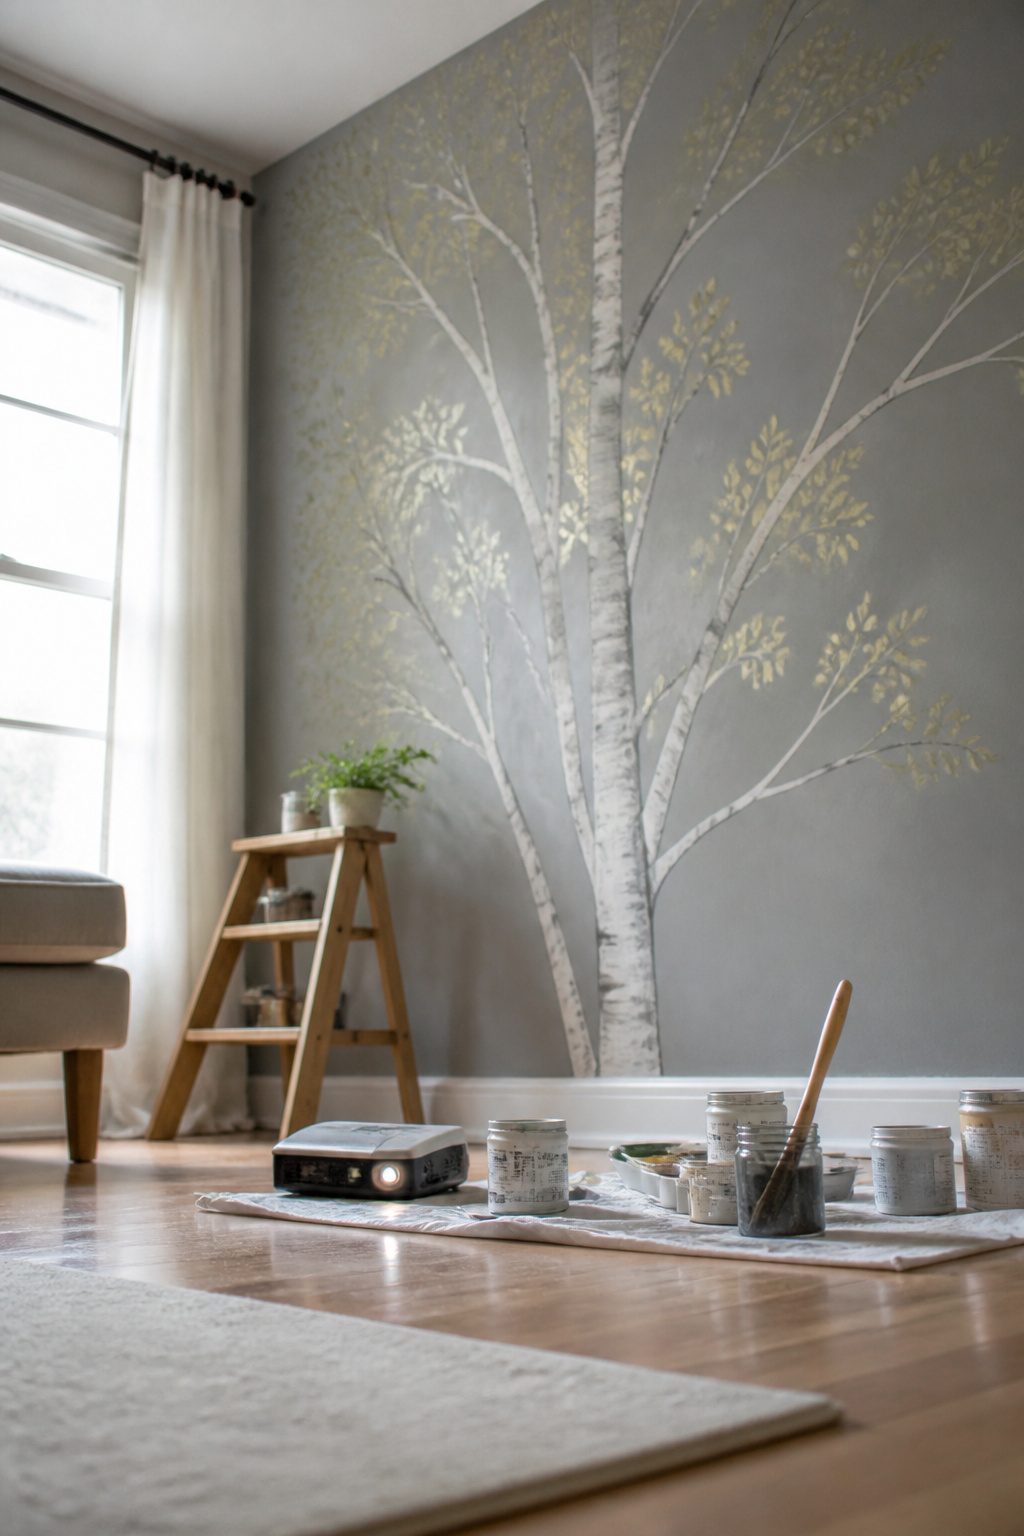
A blank wall in the bedroom had been bothering me for months, and paint seemed less permanent than the wallpaper my landlord would notice. The projector tracing method changed how I think about large-scale art: you load an image onto a laptop, aim the projector at the wall after dark, and trace the outlines in pencil. No freehand talent required, which was the only reason this project happened at all.
I wanted a birch tree stretching corner to corner, something tall and sparse against a pale gray background. The projector made the tracing easy, but I misread the scale and drew the trunk starting too high, leaving the roots cramped against the baseboard and the canopy nowhere near the ceiling. The tree looked stunted, like it had given up growing. Starting over meant washing off the pencil and waiting for the wall to dry, so I left it for a week before I could face the redo.
Eggshell or satin finish is what you want for a wall that sees real life, not flat paint that holds every fingerprint from adjusting a frame or brushing past in the dark. The slight sheen lets you wipe later without leaving a mark. I used two coats on the final version, working from the pencil lines outward, and the tree finally looked like it had room to breathe.
28. DIY Plant Holders
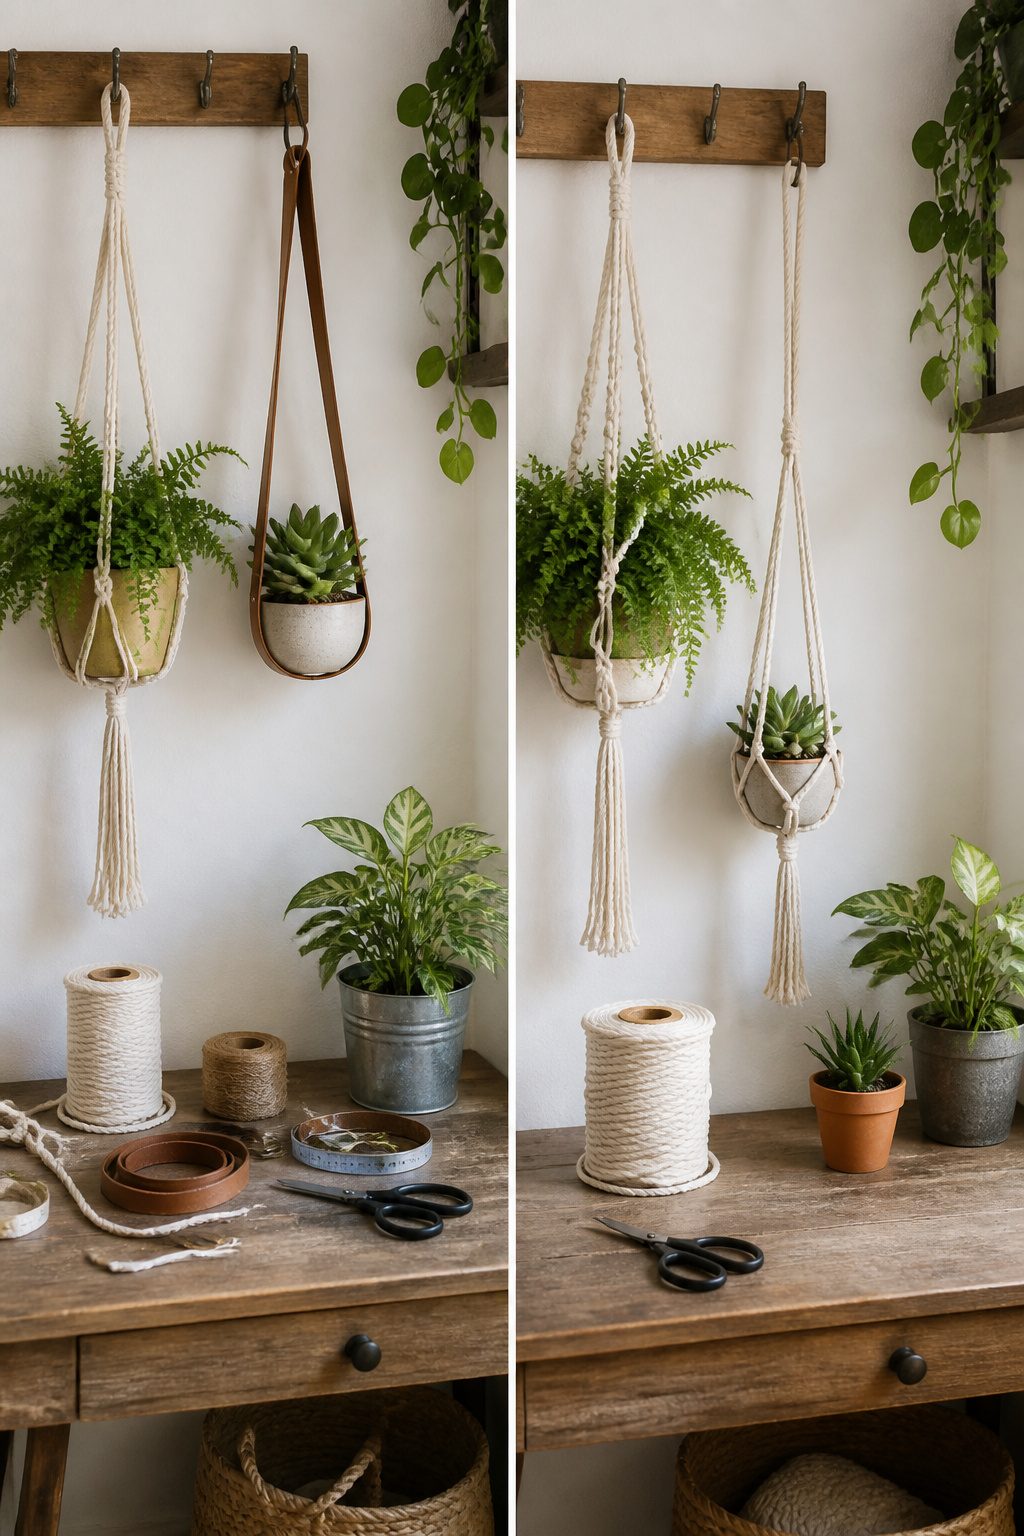
Leather slings, macrame hangers, and simple wire loops each solve the same problem with different trade-offs. A leather sling looks clean against white walls but needs studs spaced exactly where your wall has none, which I learned after drilling three holes that hit nothing but drywall. The macrame route only asks for a ceiling hook or a curtain rod you already own; jute twine and a wooden ring run a few dollars, and the knots hide uneven weight better than you’d expect. Wire loops keep the pot visible and work best for ceramic with a rolled rim that the loop can grip without slipping. For renters, the macrame wins: one hook, no leveling, and the whole thing travels to the next apartment.
29. DIY Photo Transfer to Pillow
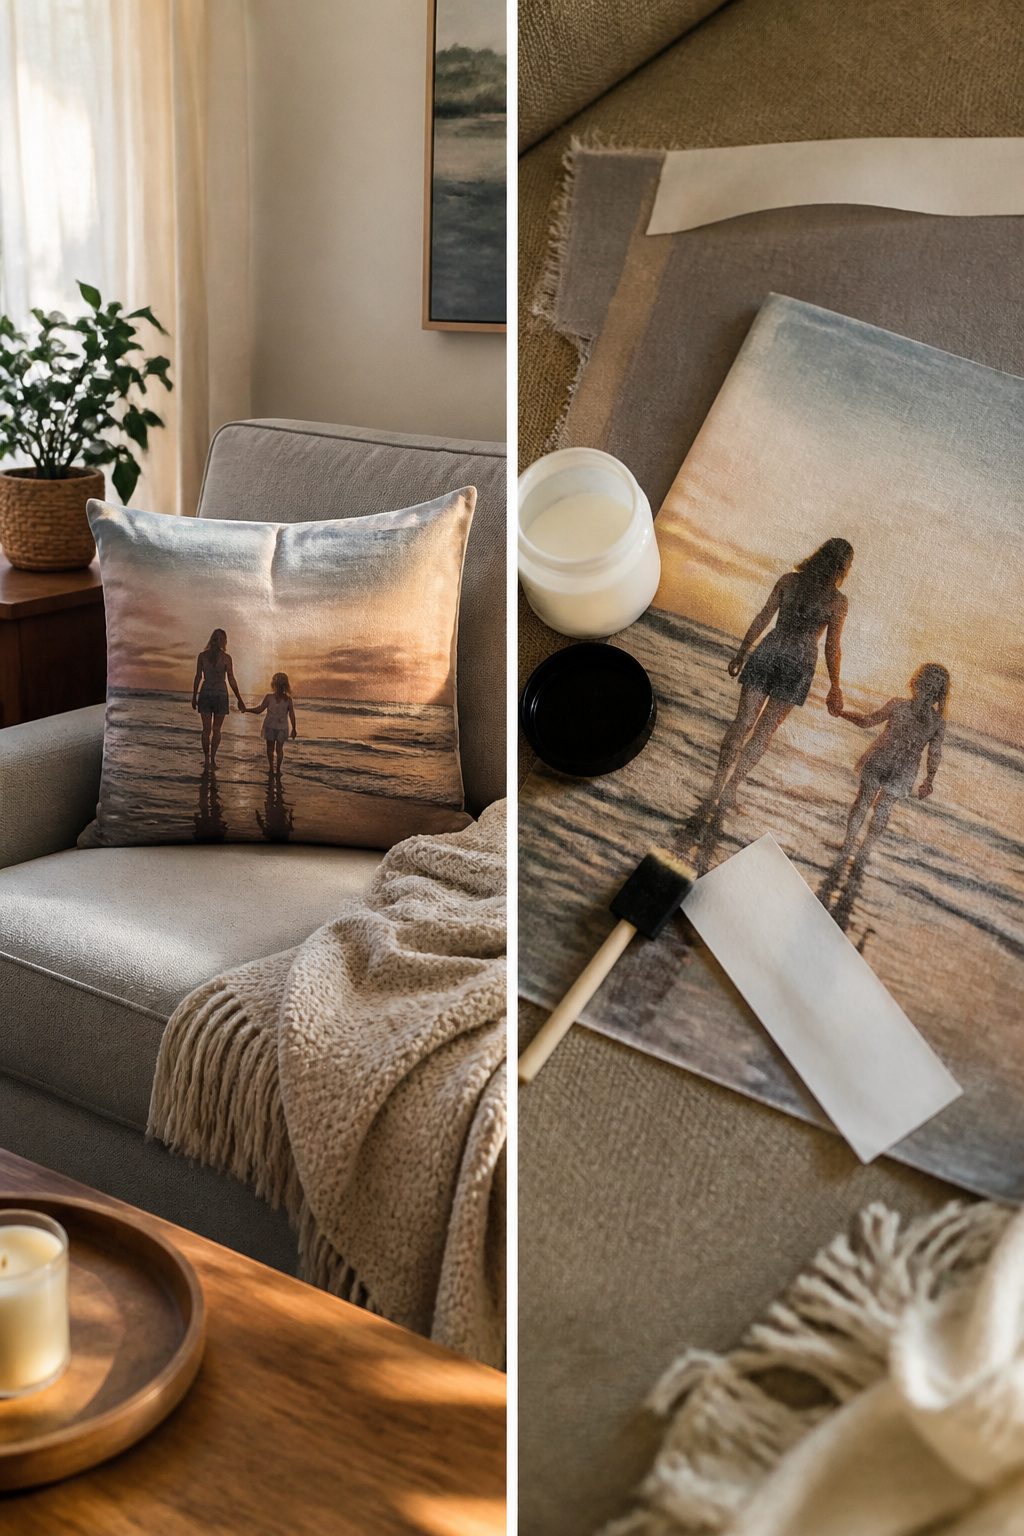
Iron-on transfer paper is the faster method, and it works well enough for a throw pillow that sits on the sofa and never moves. The image sits on top of the fabric, so any stretch in the weave shows up as fine cracks after a few weeks of use. Cotton-poly blend with a tight, almost dress-shirt weave held the image crisp; a loose linen-look cotton let the picture sag and distort the first time someone leaned against it.
Gel medium takes an evening instead of ten minutes, but the image becomes part of the fabric itself. Brush a thin layer on the printed side, press it face-down into the pillow cover, and let it dry completely before wetting the back and rubbing the paper away. The fabric stays soft, the picture stretches with it, and there is no plastic sheen catching the light.
For a renter who might want to swap the image next year, transfer paper peels off with heat and leaves the pillow usable. Gel medium is permanent; the pillow cover is now that picture, period.
30. DIY Vintage Map Decoupage Letter
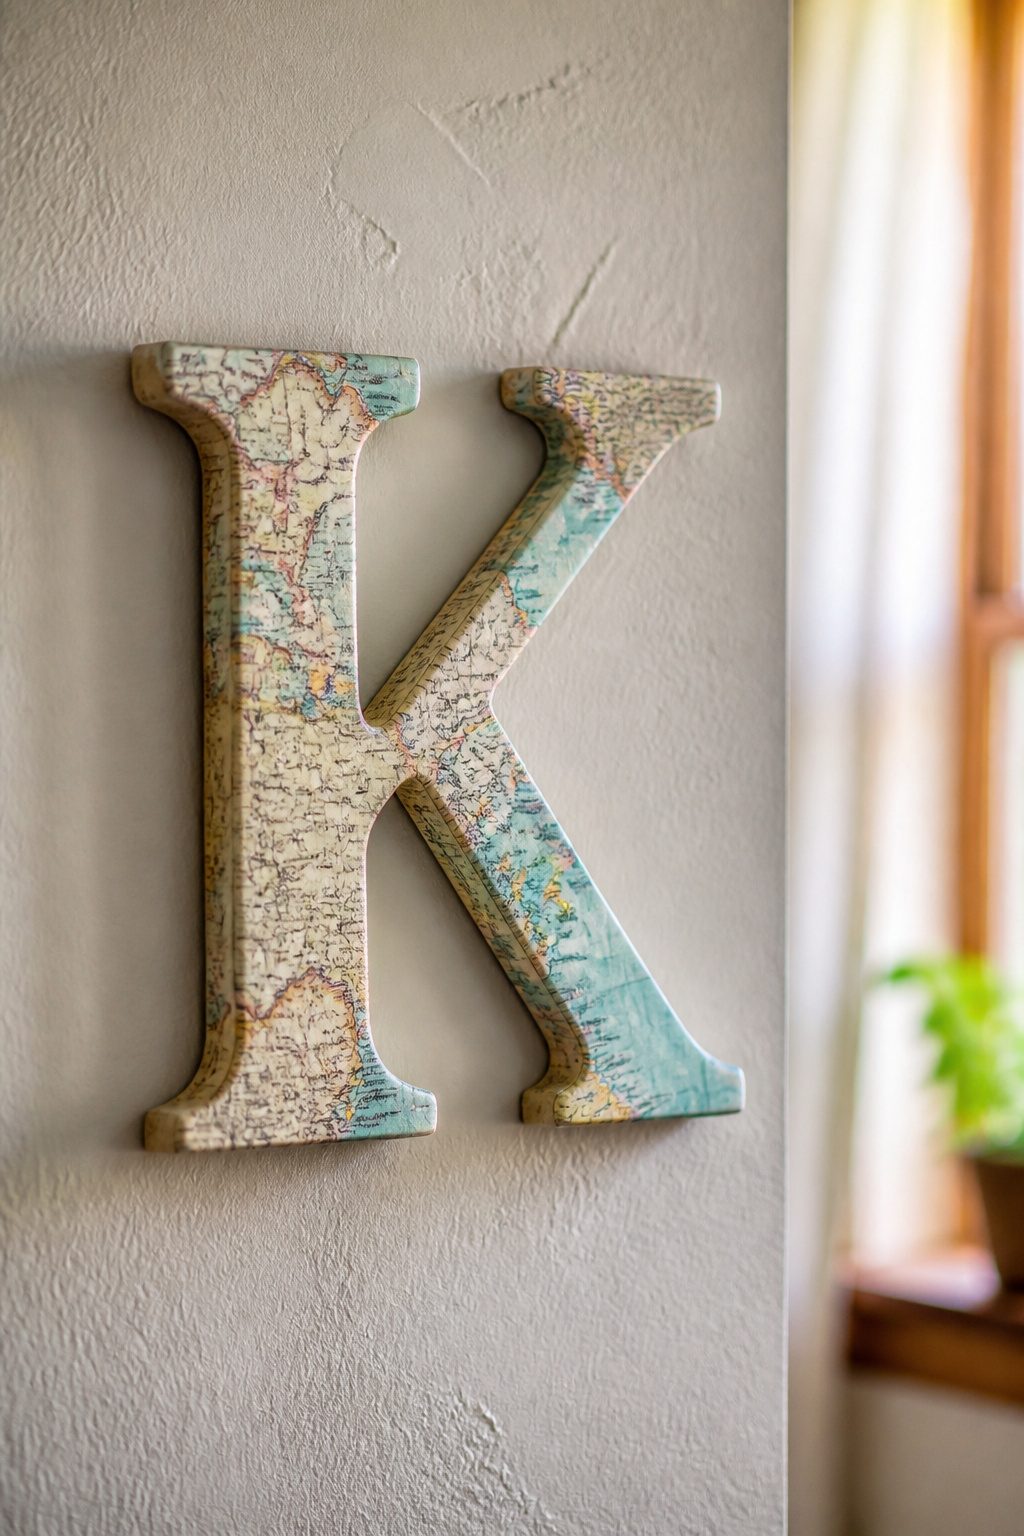
Cardboard letter forms from the craft store give you a flat face and crisp edges that paper maps can actually wrap around without tearing. I start by tracing the letter onto the back of the map section I want, then cut an extra half inch of margin all the way around. That margin is what saves you. You do not trim flush; you clip little triangles into the excess at every corner and curve so the paper folds like fabric around a cushion instead of buckling.
Wrinkles at the edges come from brushing Mod Podge straight across the rim and calling it done. What works is dabbing a thin layer onto the letter form, laying the map down from the center out, then brushing another thin coat over the top while the paper is still movable. The second coat lets you squeegee out bubbles with an old gift card, working from the middle toward those clipped tabs. Press each tab down with the edge of the card, not your finger; the card distributes pressure where a fingertip just traps air underneath.
The map section that mattered most was the coastline running through the middle of my initial. Water reads as negative space from across the room, so the letter shape stays readable even with all that busy line work layered over it. A landlocked state or a dense street grid would have turned the letter into brown mush at five feet.
31. DIY Stacked Log Fireplace Insert
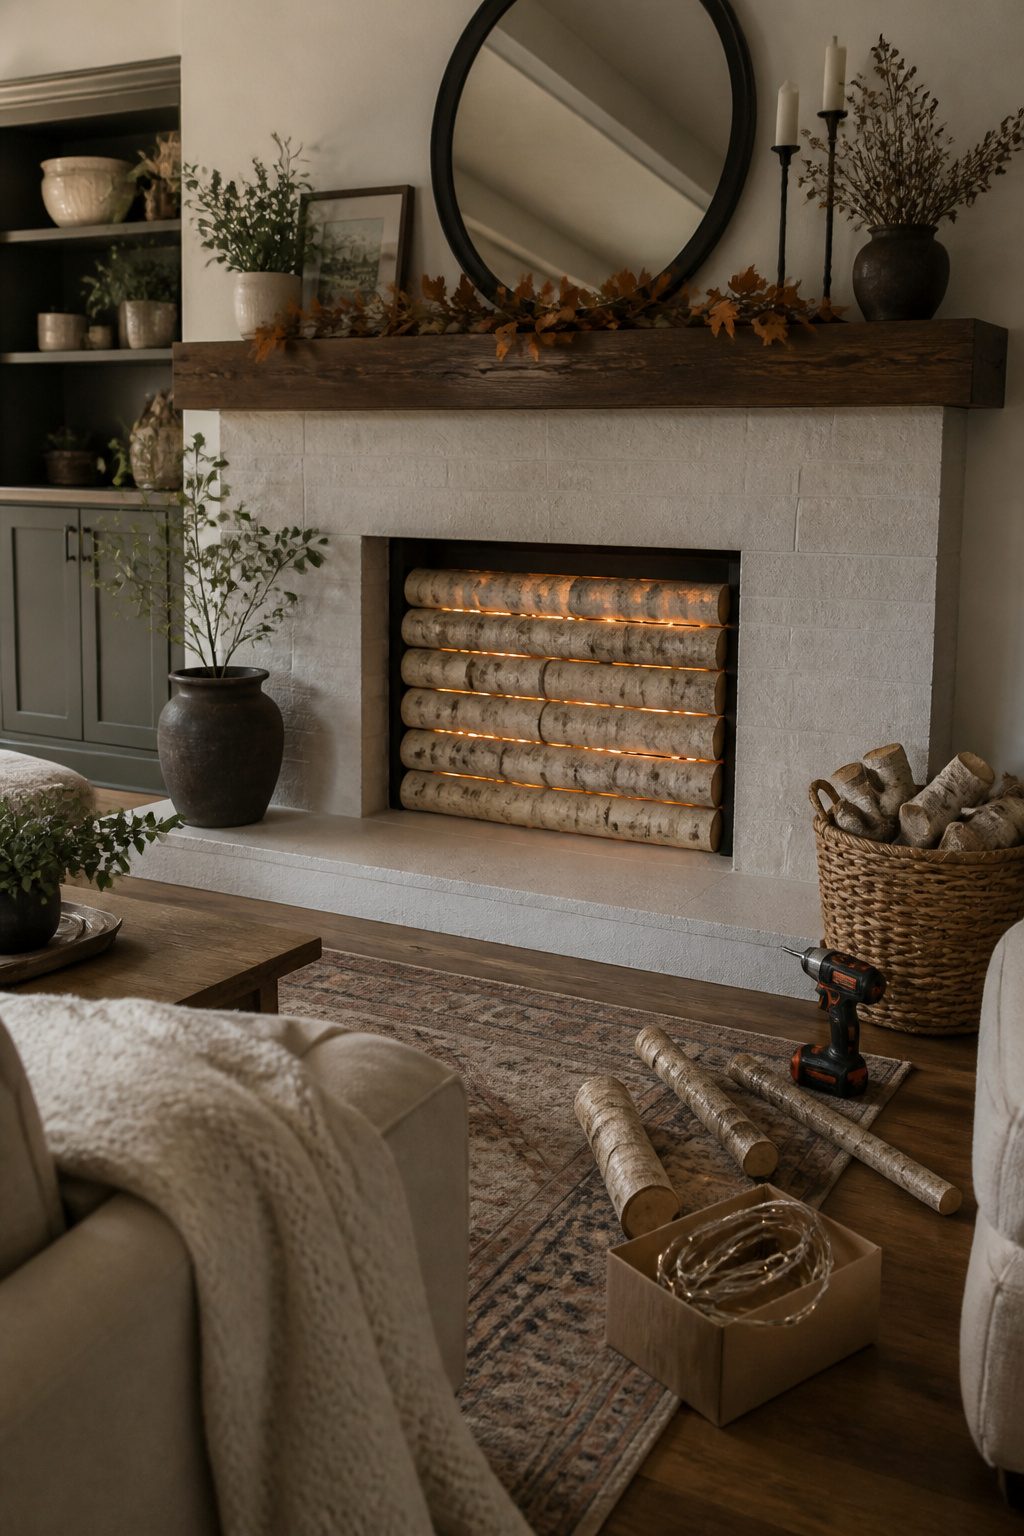
Birch logs cut to 12–14 inches long stack tight enough inside a standard fireplace to read as a full load without blocking the screen track. The LED ribbon sits on the floor behind the front row, tucked into the gap where ash would normally collect, so the glow catches the pale bark from below and bounces back like dying coals. A 2-inch gap between the log face and the screen rail lets the mesh glide shut without catching on bark edges. The ribbon itself stays cool, so there is no risk to the finish, and the transformer hides behind the center log where the eye does not travel. I wired mine to a smart plug so the embers come on at dusk and kill themselves at midnight; the whole setup draws less than a nightlight and costs under thirty dollars if you already own the logs. Renters have asked me whether the landlord notices, and the honest answer is that a closed screen and a warm glow read as seasonal staging, not a modification, which matters when your deposit is on the line.
32. DIY Felt Ball Garland
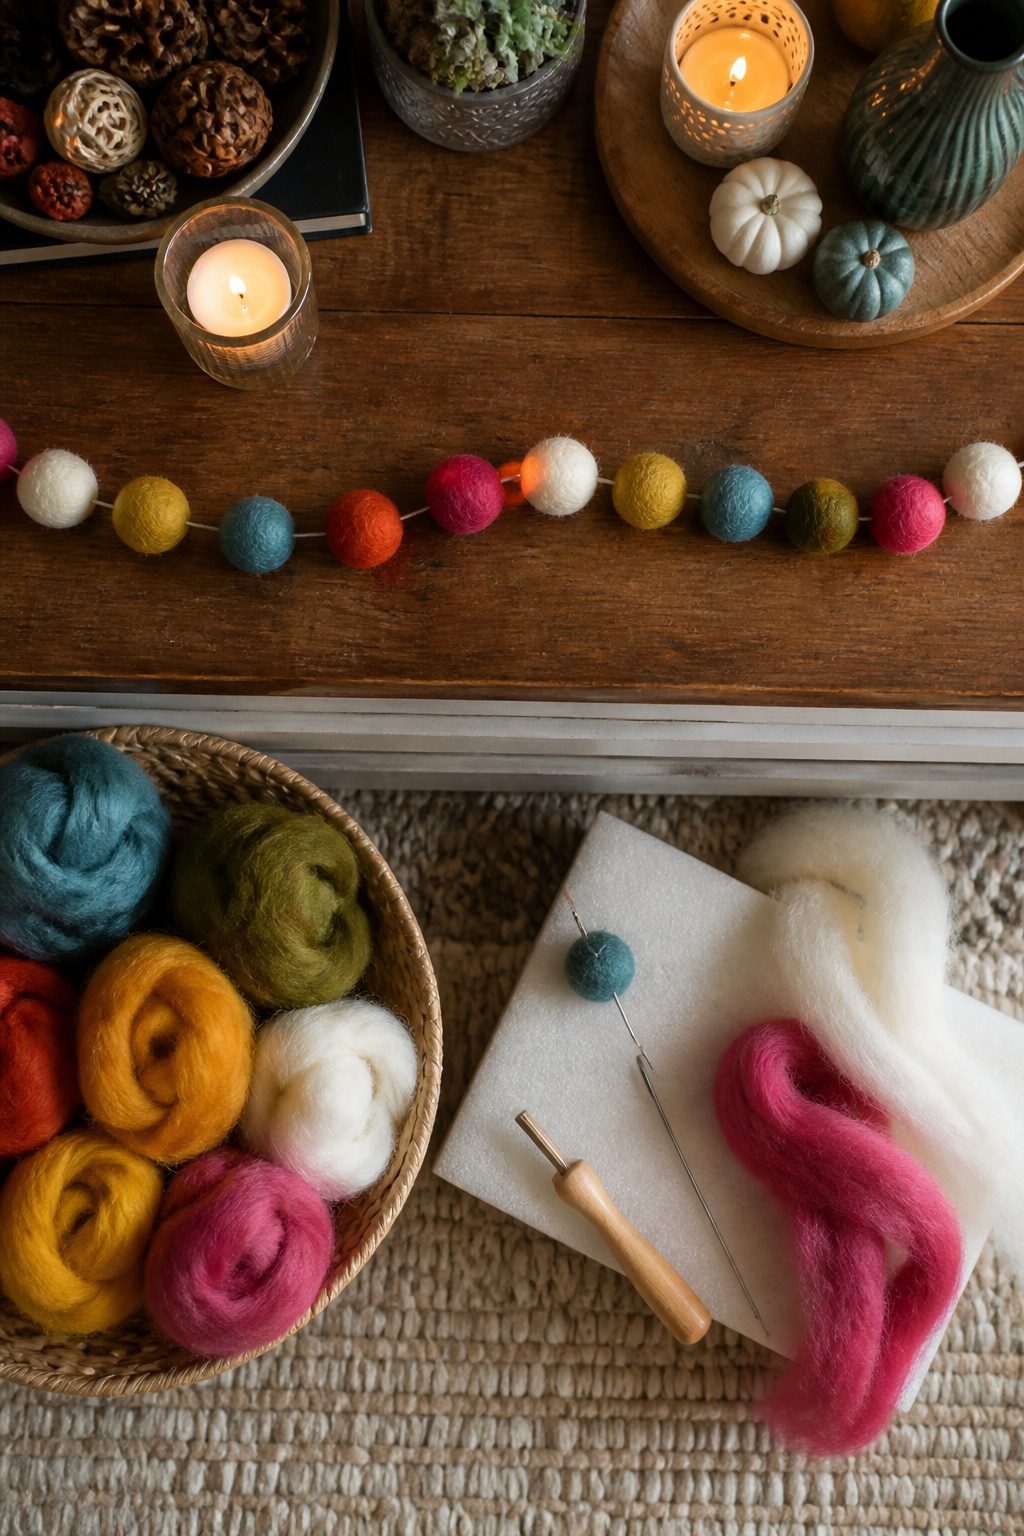
Felt ball garlands look handmade in the right way only if the spacing looks deliberate. I learned that the hard way on my first attempt, stringing balls at random intervals and ending up with something that looked like a toddler’s art project rather than decor.
The shortcut most people miss is needle-felting your own balls instead of buying pre-made ones. A bag of loose roving wool costs about half what finished balls run, and felting them takes roughly twenty seconds apiece once you get the wrist motion down. The trick is stabbing the wool just enough to hold shape without turning every ball into a dense rock; stop when the surface firms up but still yields slightly to a squeeze.
For spacing that reads as intentional, I measure twelve inches between ball centers and alternate two sizes. The random version that failed had balls clustered in one stretch and bare string in another, which drew the eye straight to the mistake instead of the color. Consistent spacing lets the wool texture do the work.
33. DIY Bottle Lighting
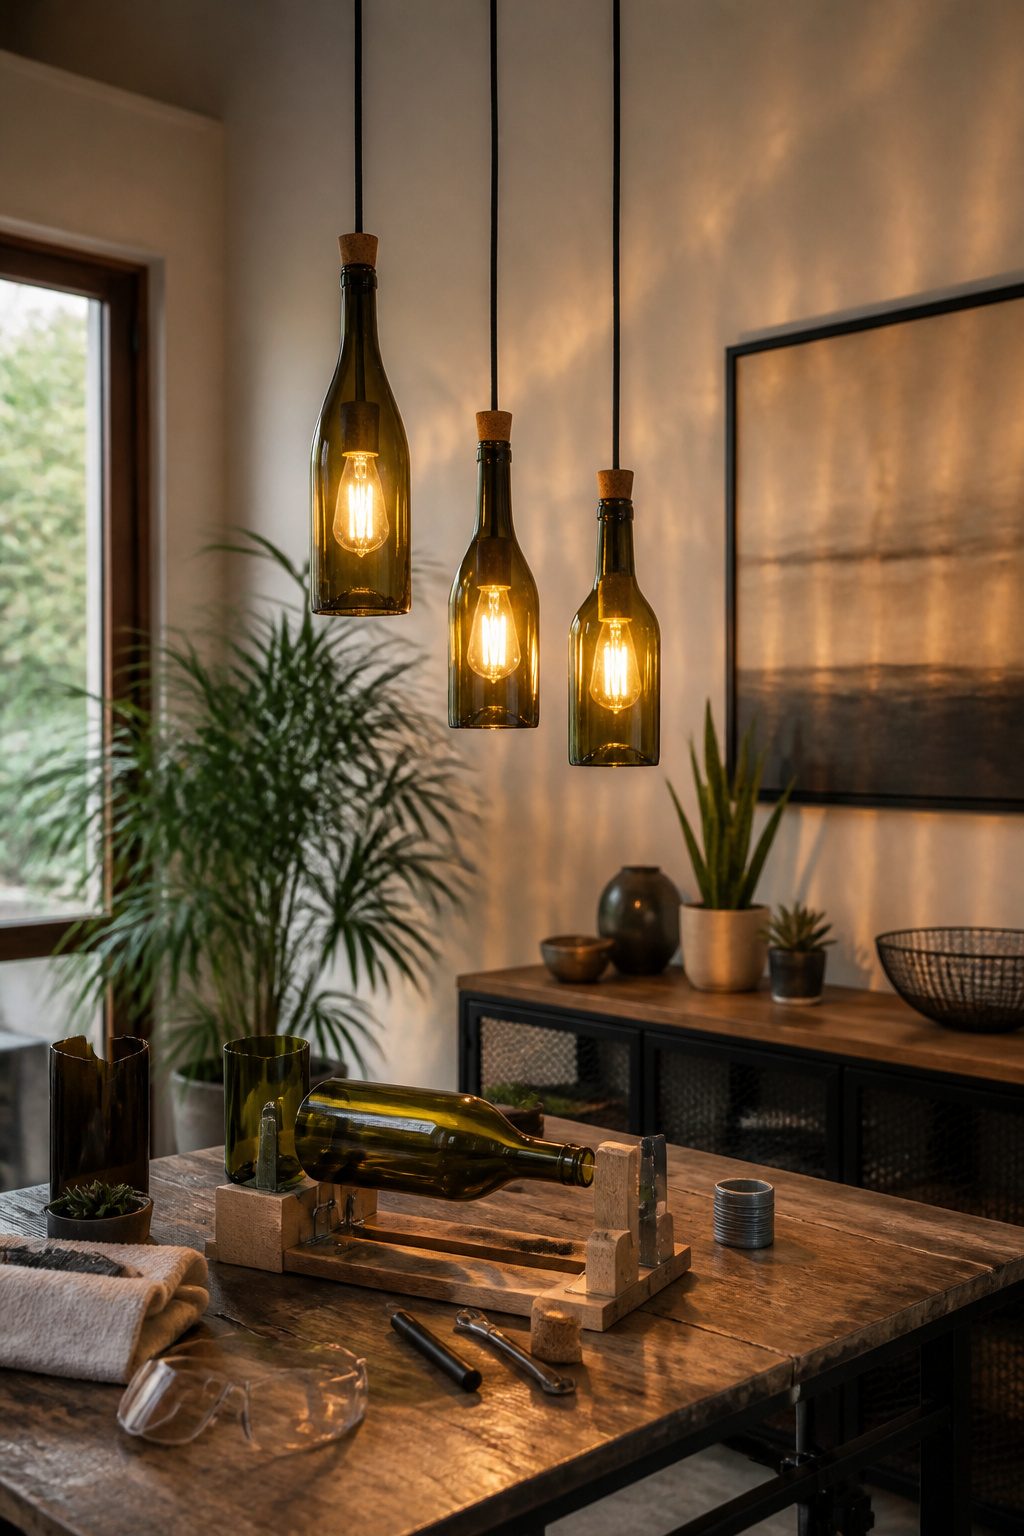
Glass bottles with the bottoms cut off make decent pendant shades, but the cutting takes practice. I tried the cold-water method on a few empties, scoring the glass with a carbide wheel and alternating boiling and ice water until the crack ran true. Two out of five split cleanly; the rest fractured above the score line and went to recycling. A bottle-cutting jig helps, though even with one, the failure rate on thin wine glass runs higher than on thicker beer bottles.
The cord-through-cork route skips the risk entirely. A rubber stopper with a hole bored through the center grips the bottle neck and lets the cord hang from a ceiling hook. The bulb sits inside the bottle, which looks the same from below. An incandescent bulb I tried on my first attempt heated the glass enough to crack it after about twenty minutes. I switched to a 4-watt LED filament bulb, which throws the same warm light and stays cool to the touch even after hours. That single swap turned the project from a fire hazard into something I left plugged in.
34. DIY Mosaic Art
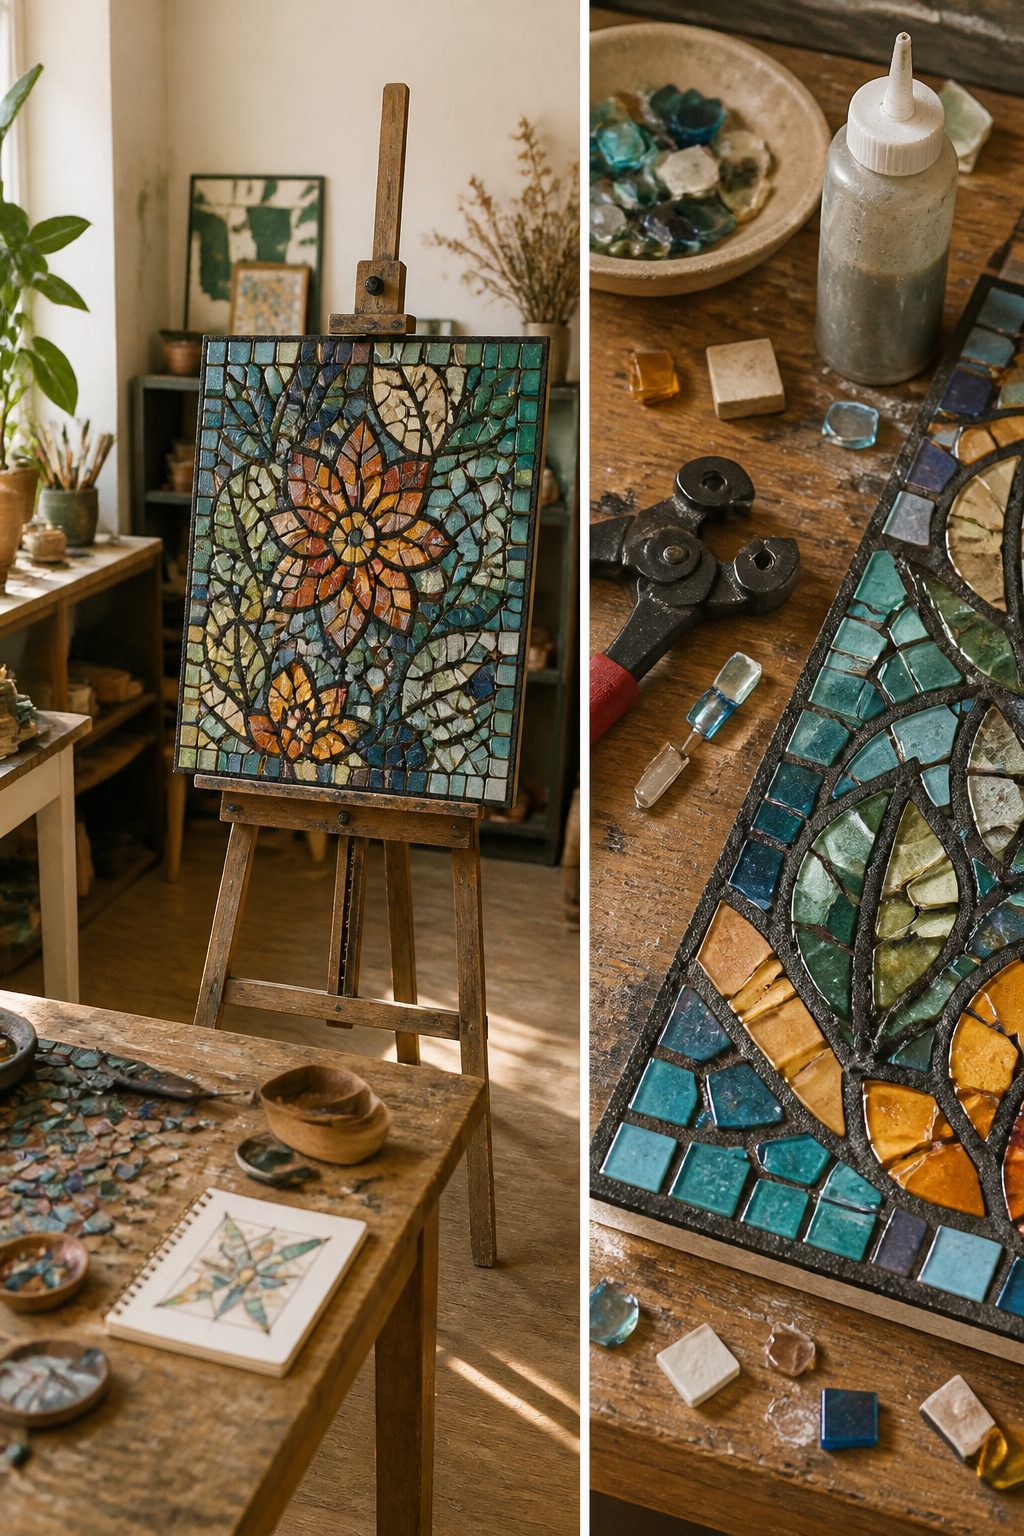
Mosaic work looks forgiving until the grout goes in and the wrong color swallows every tile you cut. I learned that the hard way on a tabletop piece where ivory grout turned the blue and green glass into something that looked like a dentist’s waiting room. Charcoal or a mid-tone gray is the safer bet for most palettes; it separates the pieces without fighting them for attention.
The base matters just as much. I started with a thin plywood backing that seemed stiff enough on the workbench, but temperature swings in the garage made it flex just enough to crack the grout lines within two months. MDF or a solid wood panel at least half an inch thick handles the movement better, especially if you seal the back face so moisture hits evenly from both sides.
A tile nipper with a carbide wheel runs about fifteen dollars and saves hours over scoring and snapping. The cheap ones with scored jaws tend to crush small glass tiles rather than bite them clean. The wheel style gives you the curved cuts that make a piece look intentional instead of grid-locked.
35. DIY Initial Wall Art
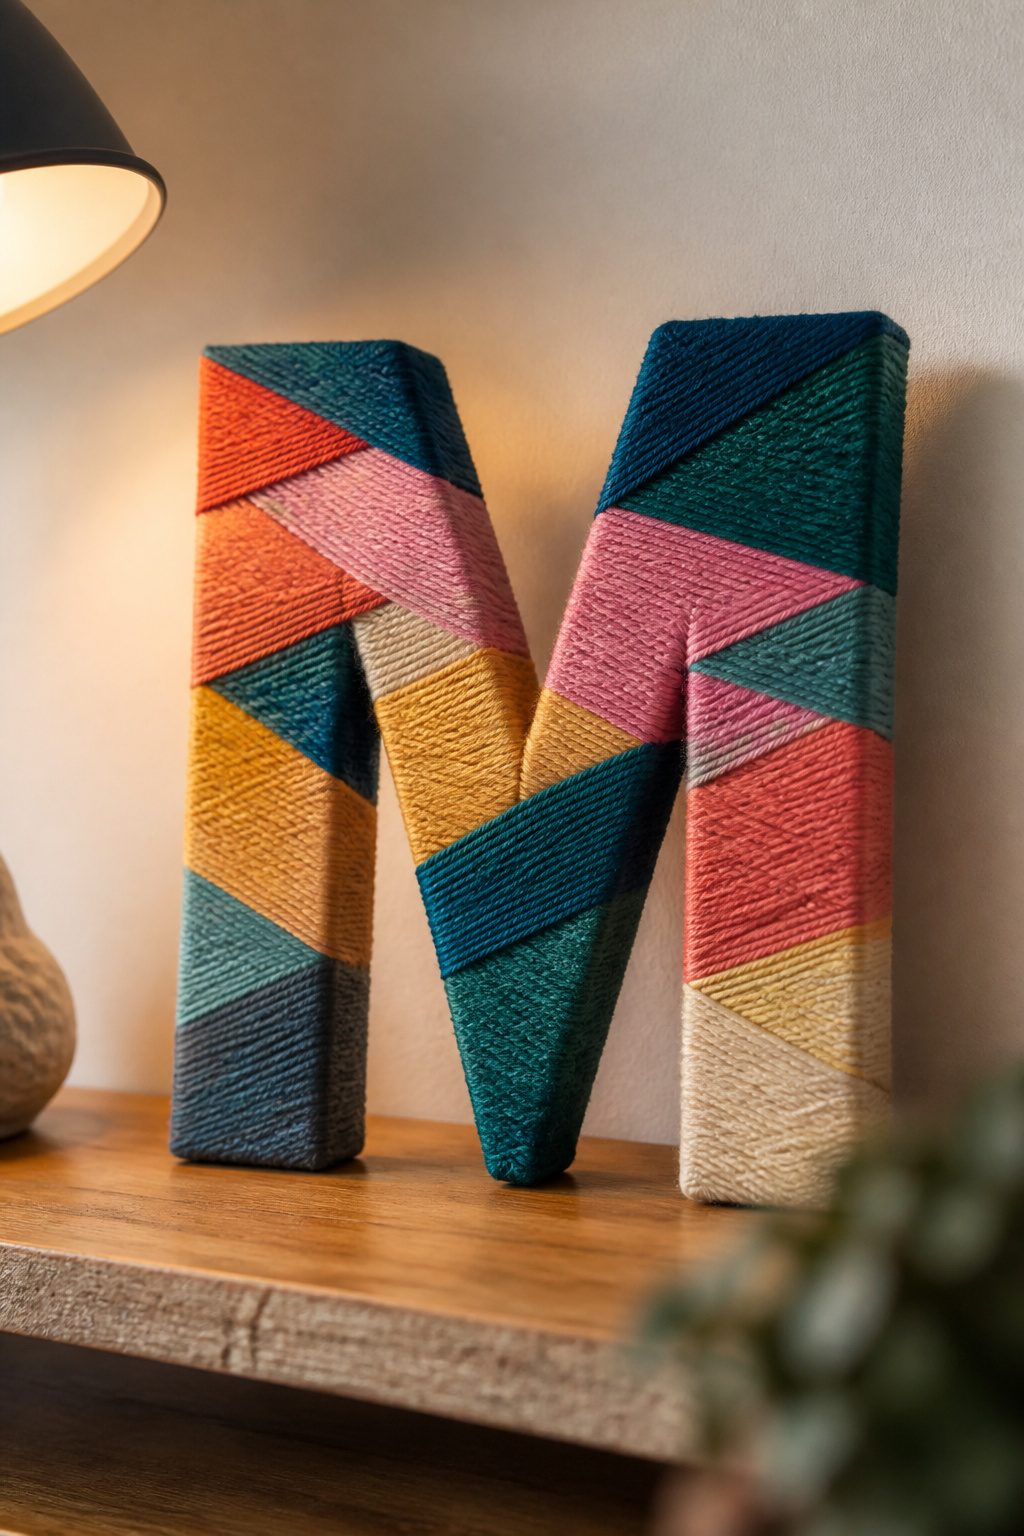
Cardboard letters from the craft store take yarn better than you’d expect, though the wire-wrap method only works if you bend the armature tight to the letter edges first. I used a bulky five-weight yarn, the kind that covers fast without leaving gaps, and wrapped two eight-inch initials in about an hour. The cardboard softens where your hands press hardest, so the corners need extra care or they round off.
I planned to hang them with wall anchors, the plastic kind rated for fifteen pounds. The drill bit went through the drywall, the anchor seated, and then the screw spun loose in the hole. The yarn letter weighs almost nothing; the anchor was overkill and left a quarter-inch hole I now get to patch. A simple picture hook would have held it fine. Bulky yarn and a basic hook: that is the whole trick.
36. DIY Paper Wall Hangings
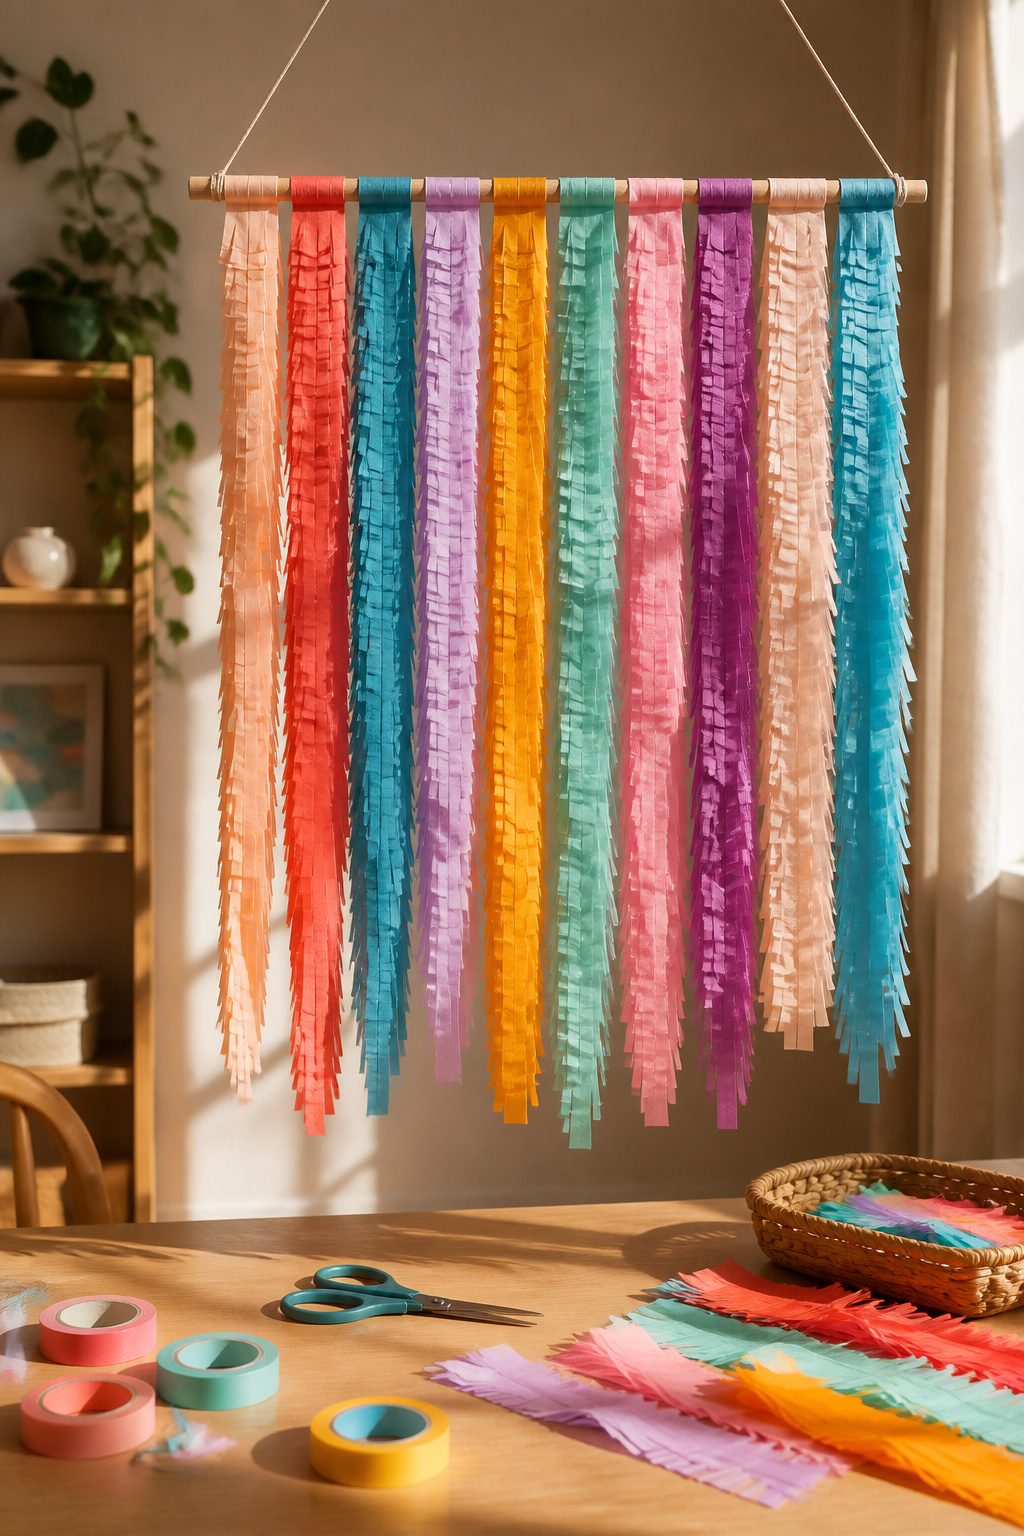
Crepe paper fringe hangs better than it sounds. I cut strips about two inches wide, stacked six layers, and ran a fringe scissors down one edge. The stack fans out into something that moves like grass in a breeze when you hang it. Cardstock geometry needs a bone folder, not just a crease with your thumb. I scored every fold line first, then pressed the mountain and valley folds in sequence; the shape held its own weight after that.
Masking tape failed inside two weeks once summer humidity hit. The fringe pulled away from the wall in loops, and the cardstock corners peeled like old wallpaper. I switched to removable poster strips, the kind with the pull-tab release, and that bond has stayed flat through three months of bathroom steam.
37. DIY Rope-Wrapped Vases
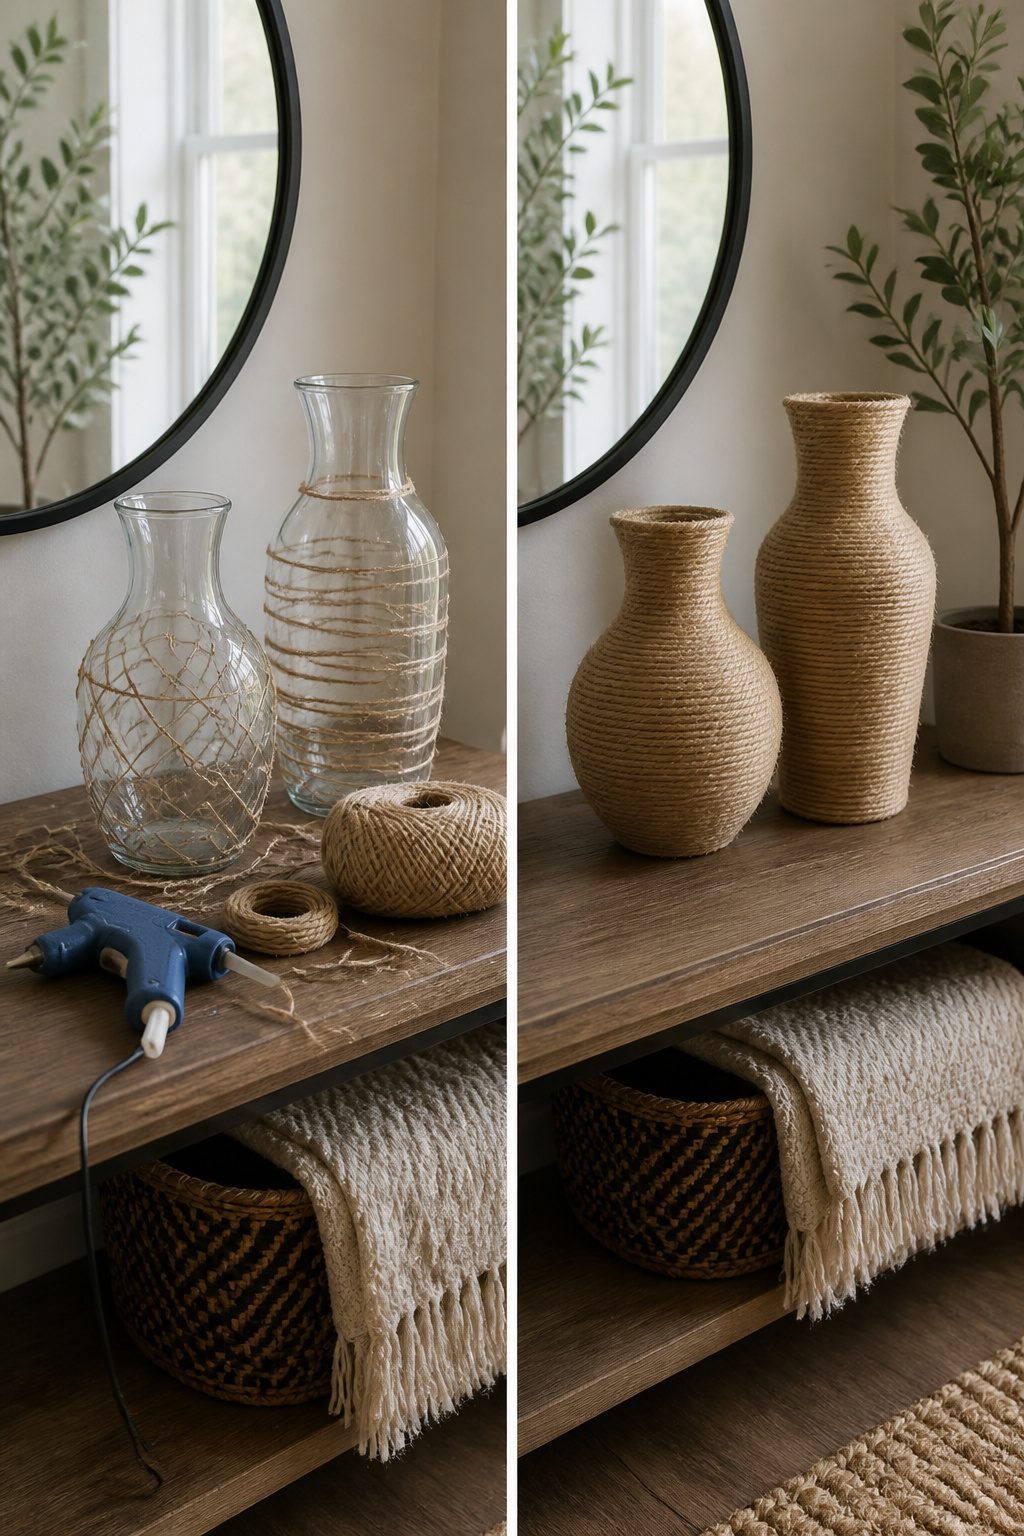
Rope-wrapped vases look like a weekend project until the glue lets go three days later. The first time I tried this, I used craft glue on a glass cylinder, and the sisal peeled in a ribbon the second time someone walked past the shelf. Hot glue sets fast and holds against the slick surface, but it leaves a harder line where the rope meets itself. Craft glue gives a softer edge if you clamp each turn and wait the full dry time, which most people skip. On glass, hot glue wins for staying power; on ceramic, craft glue catches better because the surface has tooth.
The rope diameter matters more than the glue choice. Quarter-inch cord looks like something from a craft-store clearance bin once it is wrapped. Half-inch or three-quarter-inch rope reads nautical, especially in natural fibers with the slight fuzz still on them. Thicker rope also hides the vase shape underneath, which helps when the original glass is nothing special, a dollar-store cylinder or a jar that lost its lid. Thinner rope needs a cleaner vessel to start with, and it takes twice as many turns to cover the same height, which means twice as many chances for the line to wander.
One trick that saved my second attempt: start the first turn at the bottom and tape it in place while the glue sets, then work upward in sections you can finish before the hot glue cools. The bottom edge takes the most handling, and if it lifts, the whole wrap loosens from there.
38. DIY Wall Hanger with Embroidered Designs
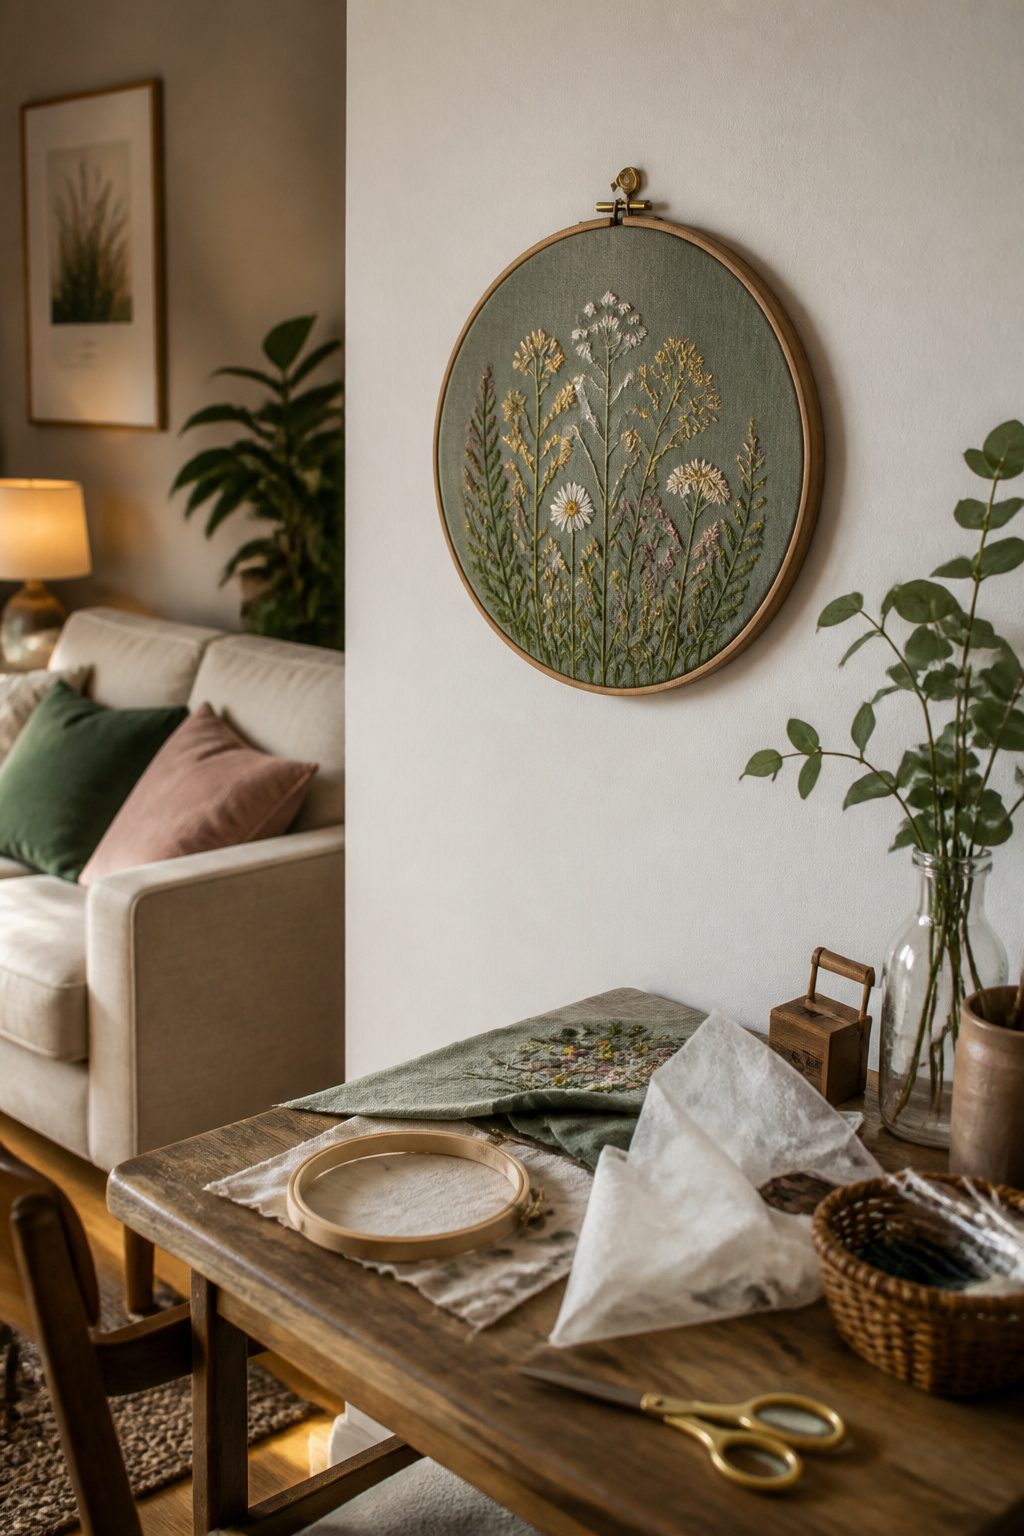
Two approaches to embroidered wall hangers split cleanly on whether you want the fabric framed or free. The hoop method keeps everything mobile: stretch your fabric in a wooden ring, stitch through it, and the tension stays put because the hoop does the work. Mounted cloth skips the frame entirely. You staple fabric straight to a wooden backer, then embroider on that fixed surface. The risk there is puckering, since the cloth has nowhere to give. A tear-away stabilizer behind the fabric solves that. Baste it on, stitch through both layers, then pull the stabilizer free once the design is done. The stitches sit flat and the wall mount stays clean. I tried skipping stabilizer once on a linen scrap mounted directly to plywood. The center pulled tight, the edges bagged, and the whole piece had to come down. For renters especially, the hoop method wins on portability. Take it with you when the lease ends. The mounted version looks more finished on the wall, but only if the stabilizer step is non-negotiable.
39. DIY Candle Dish with Beach Shells
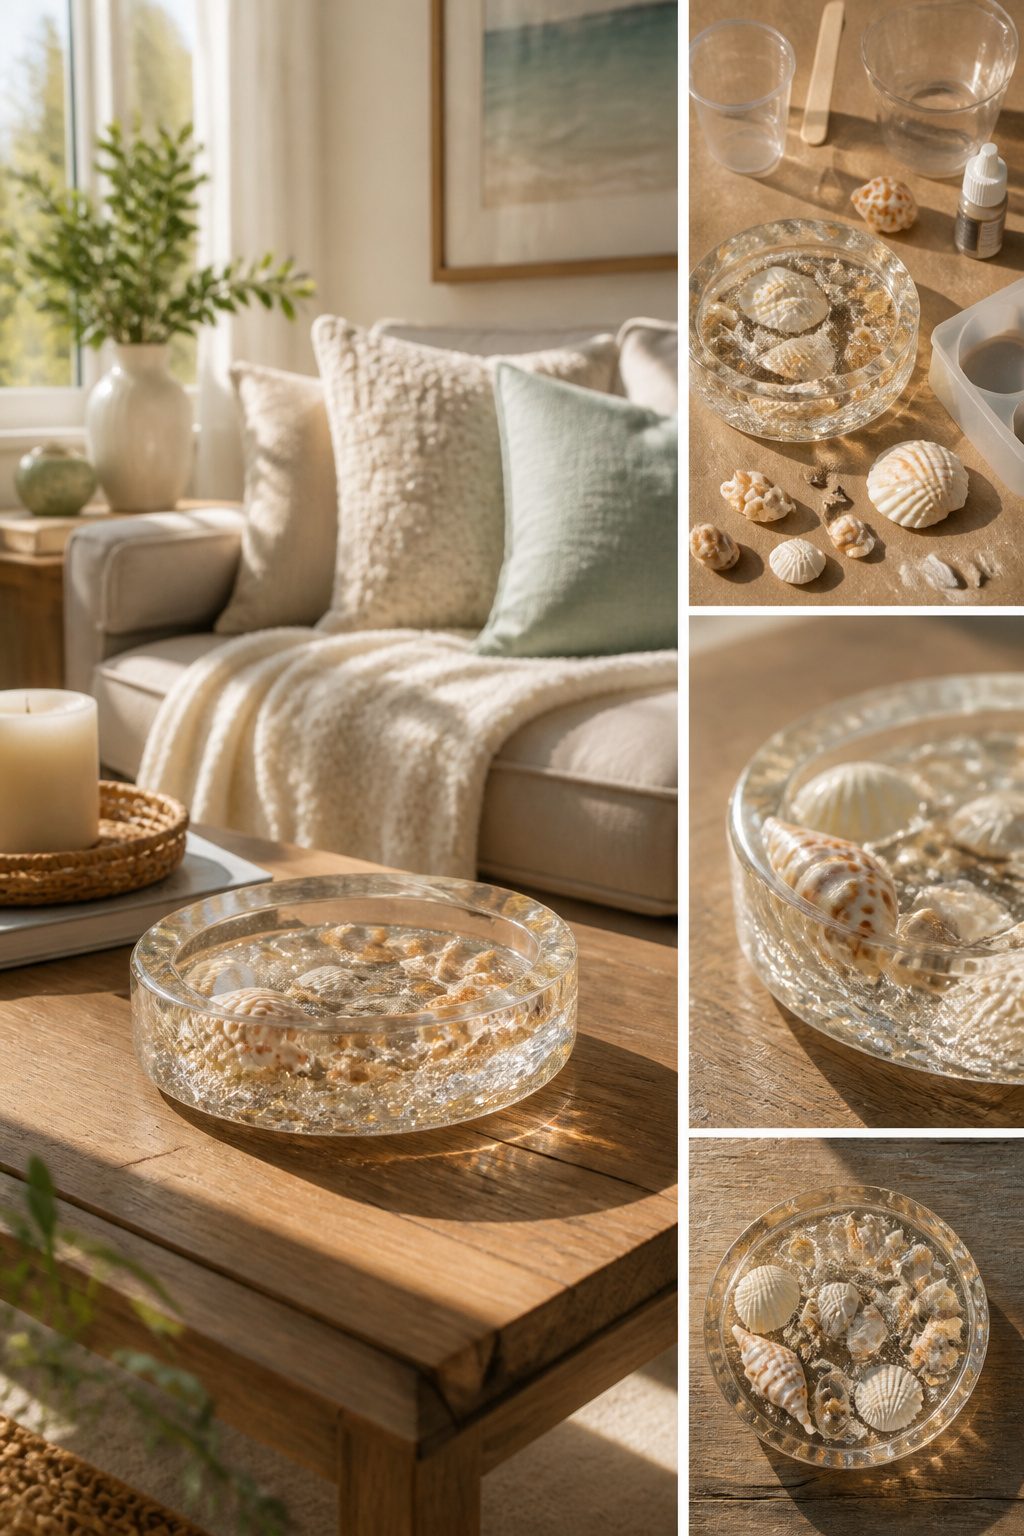
Resin candle dishes with beach shells look effortless on Pinterest, but the pour depth is what keeps the wick upright once the wax melts down. A quarter-inch layer of clear resin gives the shell enough hold without burying it completely; anything deeper and the wick tab floats before it sets. Shells need more than a rinse. I learned this after one batch smelled like low tide the second the flame warmed the dish. A soak in weak bleach water, then a full dry in the sun, takes care of the organic residue that resin traps forever. Sand seemed like a natural inclusion for texture, but against the clear resin it read as pocket lint or dried mud, not beach. I picked it out with a toothpick while the pour was still tacky and left the shells to speak for themselves.
Budget-Friendly Ideas

The best supply for cheap DIY decor is usually what you already own and stopped noticing. I keep a cardboard box in the closet for pieces that feel dated: a brass candlestick, a frame with the wrong finish, a vase that came free with flowers. Six months later the annoyance fades and the shape looks promising again. A $3 can of spray paint or a $5 sample jar of wall paint turns most of those rejects into something that fits the room today.
For actual shopping, the dollar store hardware aisle and the thrift store housewares section beat the craft store on price by half. I buy wire, rope, basic tools, and glassware there. Facebook Marketplace and Buy Nothing groups hand over leftover paint, scrap wood, and fabric remnants for the cost of driving to pick them up. The mentality that keeps this cheaper than buying retail is treating the project budget as a hard $20 cap including the thing you would have bought instead. If a store mirror costs $40, my DIY version needs to come in under $20 total or the savings evaporate and so does the point.
Frequently Asked Questions
What are some easy DIY home decor ideas?
Easy diy decor ideas from the article include painted pinecone wreaths, crocheted poufs, mason jar lanterns, no-sew cushion covers, washi tape wall designs, and macrame flower pot hangers. Most take a single afternoon and need only basic supplies like craft paint, rope, or fabric. Several projects, such as the painted candlesticks and upcycled furniture, start with thrift-store finds to keep both cost and complexity low.
How can I refresh my home decor on a budget?
The article shows how to refresh a room for under $15 with projects like a painted pinecone wreath or a DIY headboard made from peel-and-stick foam panels and discount fabric remnants. Concrete candle holders use yogurt containers as molds and run about eight dollars for a bag of mix. Dollar-store frames, vinyl flooring remnants for painted floor cloths, and washi tape wall designs all keep spending minimal while replacing or updating existing pieces.
What materials do I need for DIY home decor projects?
Common materials across these diy decor ideas include acrylic paint and self-etching primer for metal, super bulky yarn and smaller-than-recommended crochet hooks for poufs, rare-earth neodymium magnets rated N42 for refrigerator magnets, and twisted or braided cotton rope in 5 mm to 3/8 inch thickness for macrame and hanging shelves. The article also uses flour and water for papier mache paste, Mod Podge Fabric for book covers, and exterior latex with polyurethane for painted floor cloths.